Parmesan Dutch Baby with Creamy Mushrooms


Lately I’ve been working my way through a cookbook I’ve had for several years, Smitten Kitchen Every Day. The Vegetarian Mains section has won my heart (and appetite). Every recipe I’ve made has been delicious and weeknight doable. Yay!

The book even includes a recipe that makes two (and only two) large oatmeal raisin chocolate chip cookies. You can satisfy your big cookie craving without having to fight not to keep eating cookie after cookie, which is what usually happens when I bake.

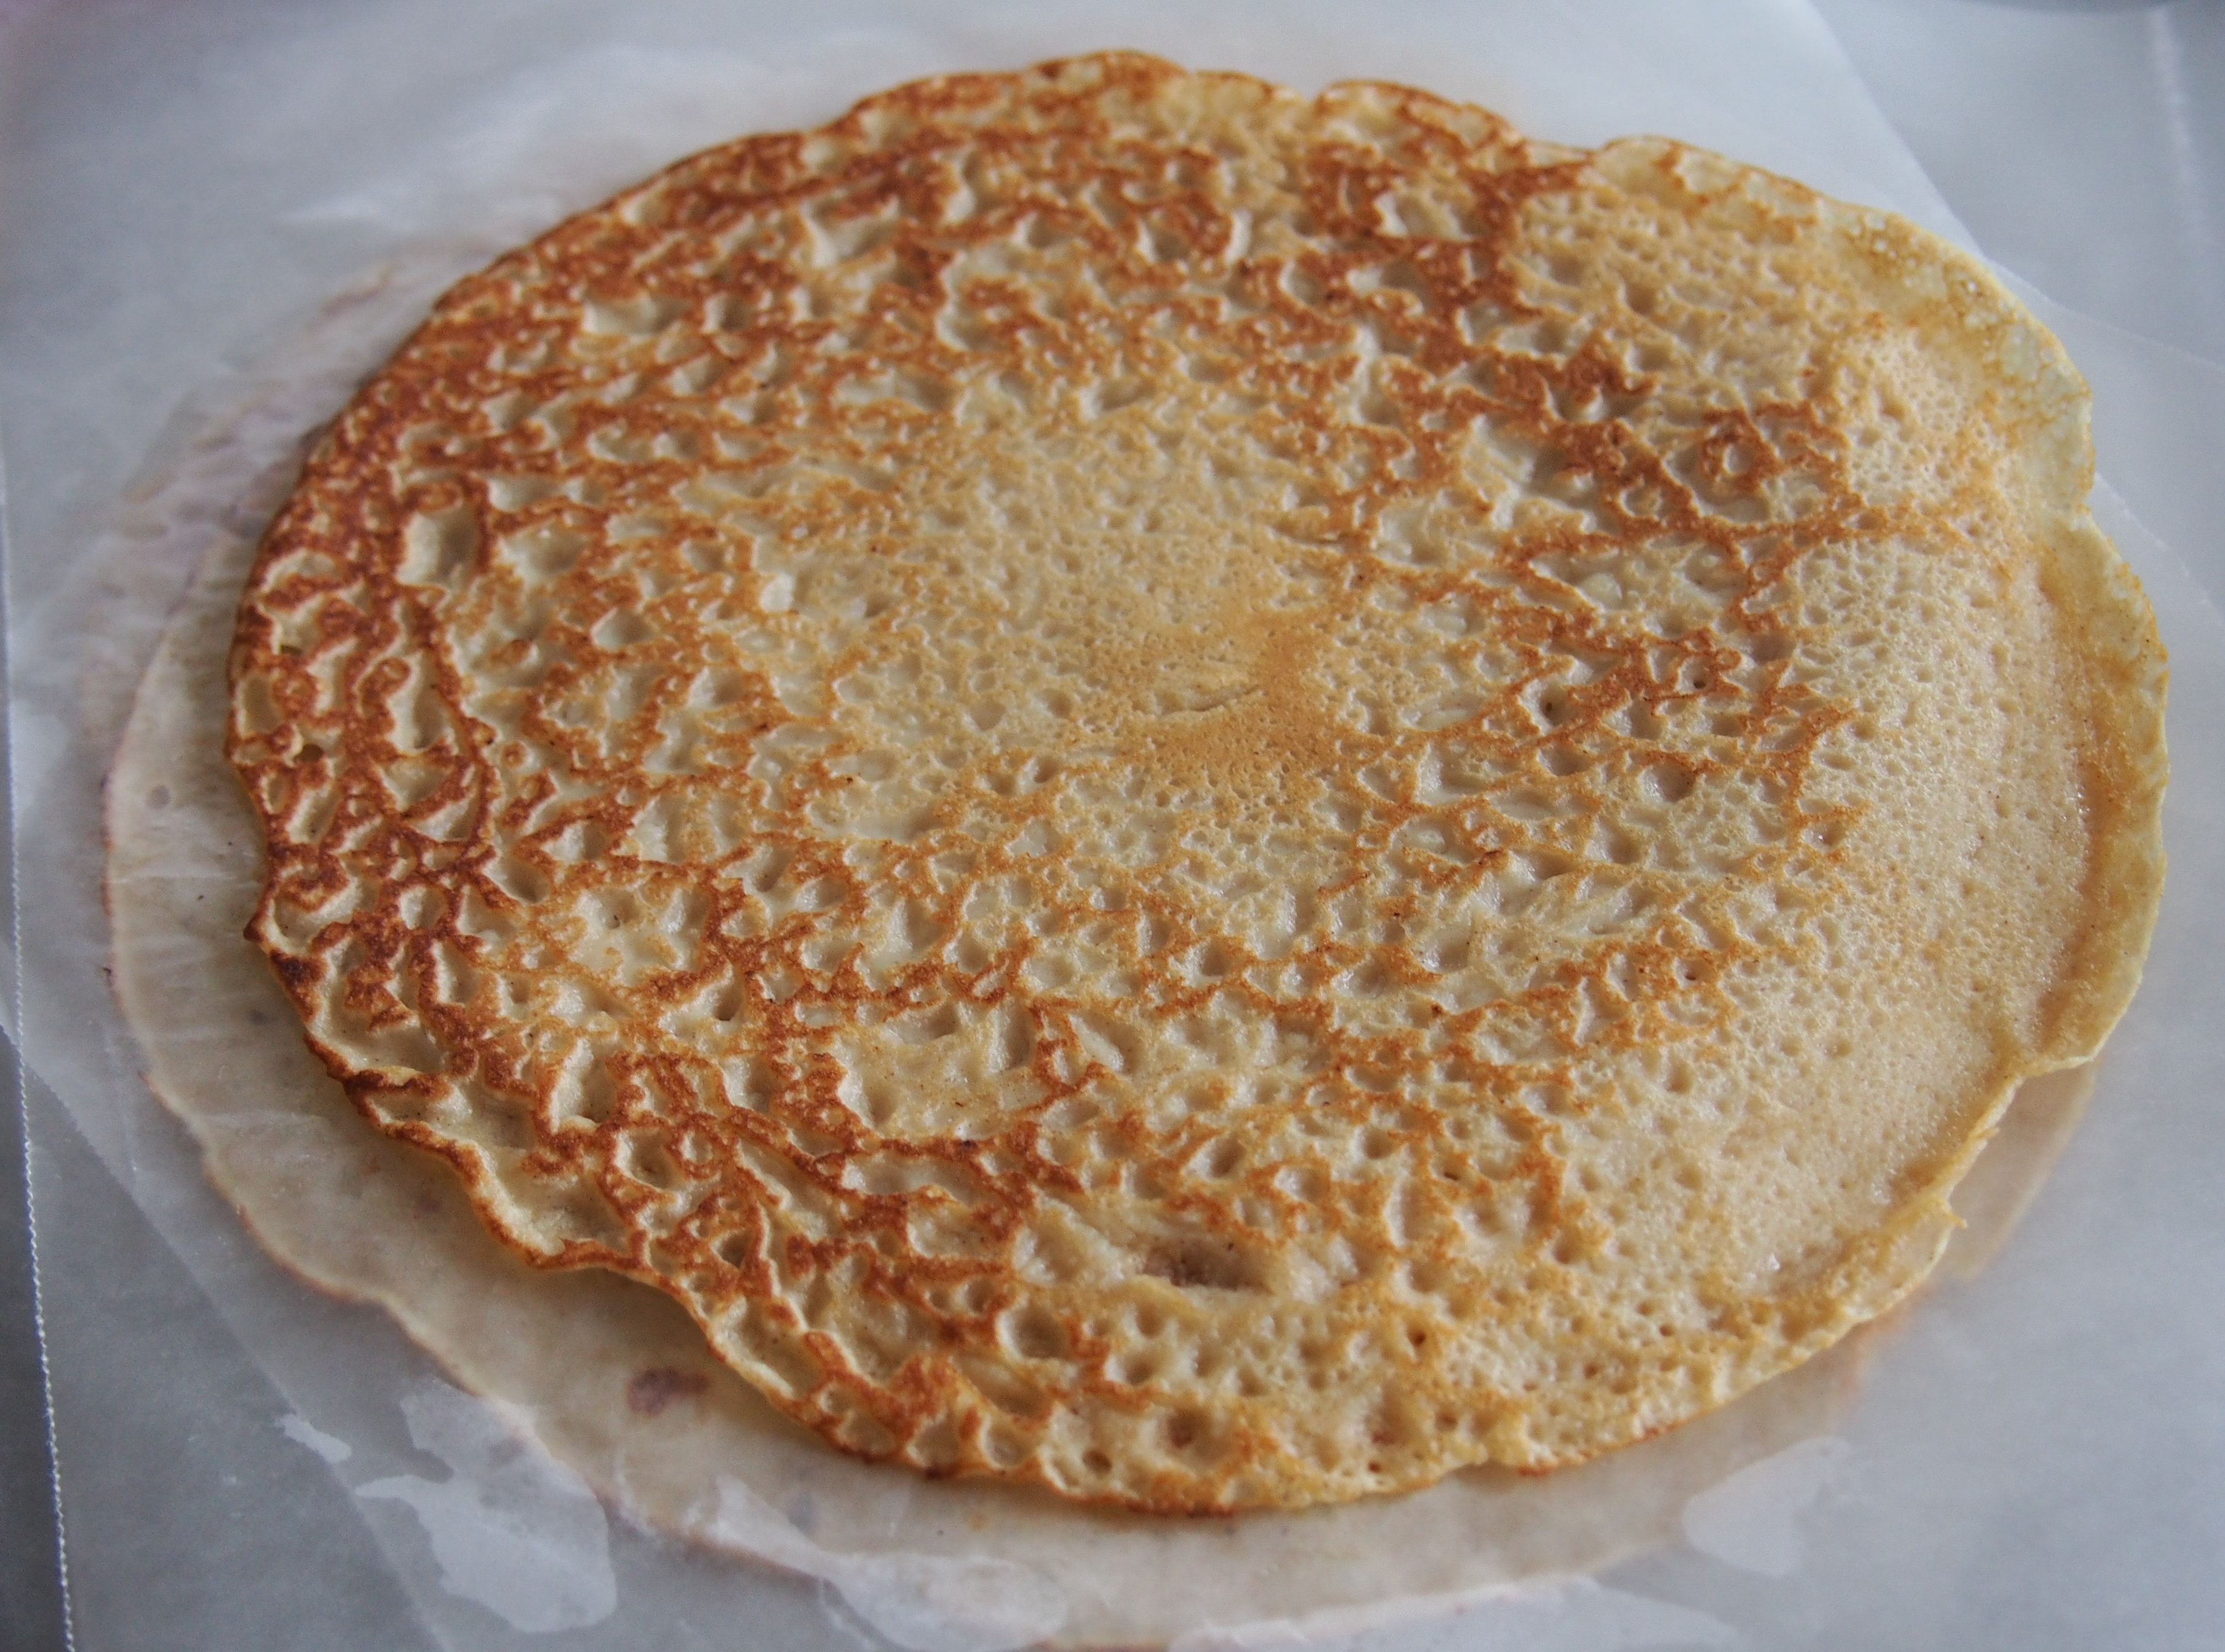
Last summer Dutch baby pancake recipes seemed to be everywhere, and I finally tried a breakfast version. Wow! The special treat that pancakes bring, but without the hands-on stove-top flipping they require. Plus, they were so darned cool looking with their rumpled one pan presentation. 

A Dutch baby isn’t going to feed a crowd but is plenty for two with a tossed salad or four as a side dish with a main course. This recipe is a nuanced, hearty concoction that won’t leave you feeling weighed down. I sub homemade cashew cream for the called-for heavy cream; use whichever you prefer—I’m not sure you’d be able to tell the difference. Enjoy!

Parmesan Dutch Baby with Creamy Mushrooms

Slightly adapted from Smitten Kitchen Every Day by Deb Perelman

Creamy Mushrooms:
1 tablespoon unsalted butter

1 tablespoon extra-virgin olive oil

1 medium shallot, minced

8 ounces cremini mushrooms, cleaned and chopped small

Kosher salt and freshly ground black pepper

1 tablespoon dry white wine or dry vermouth (I used vermouth)

3 tablespoons heavy cream or cashew cream (cashew cream recipe can be found as part of this recipe)

Dutch Baby:
4 large eggs, room temperature

½ teaspoon kosher salt

Freshly ground black pepper

½ cup all-purpose flour

½ cup milk, room temperature (I’ve made this with both skim and whole milk and really couldn’t tell the difference)

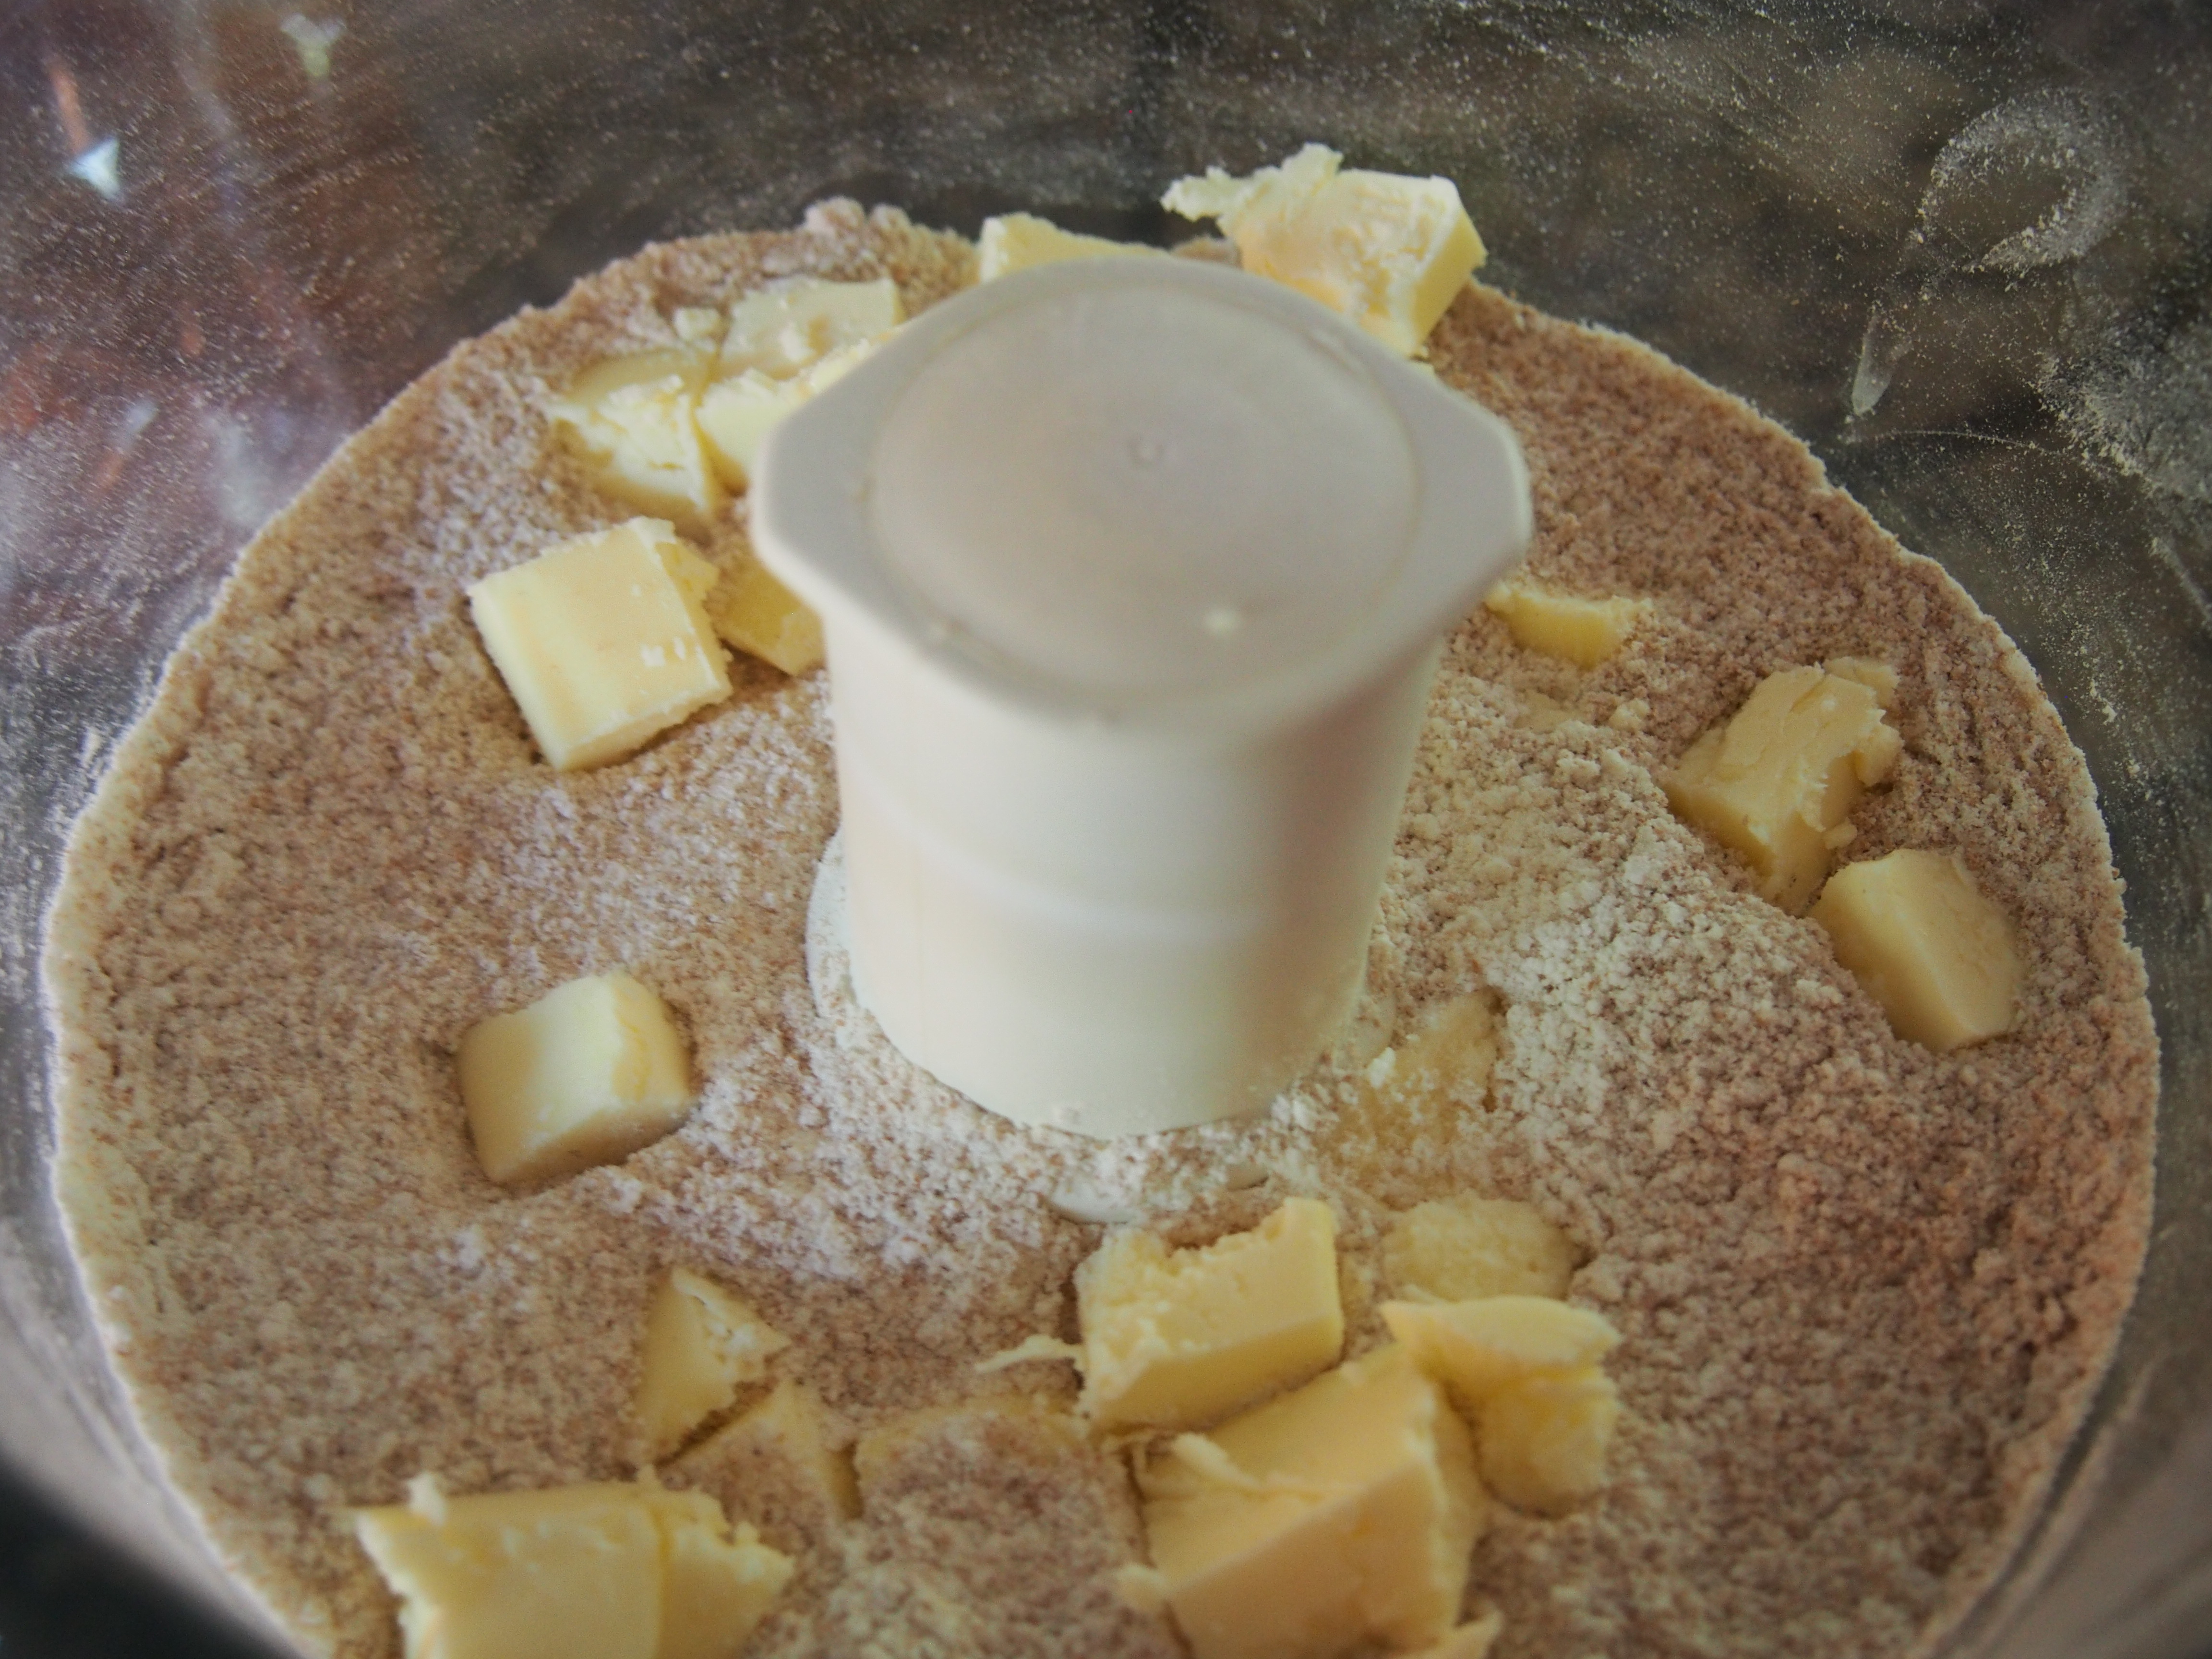
3 tablespoons unsalted butter, cut into cubes

3 tablespoons finely grated Parmesan cheese

1 tablespoon chopped fresh chives or parsley, for garnish

Place a 10- or 12-inch cast iron pan (or other similar sized ovenproof skillet) in your oven and preheat it to 425 degrees F.

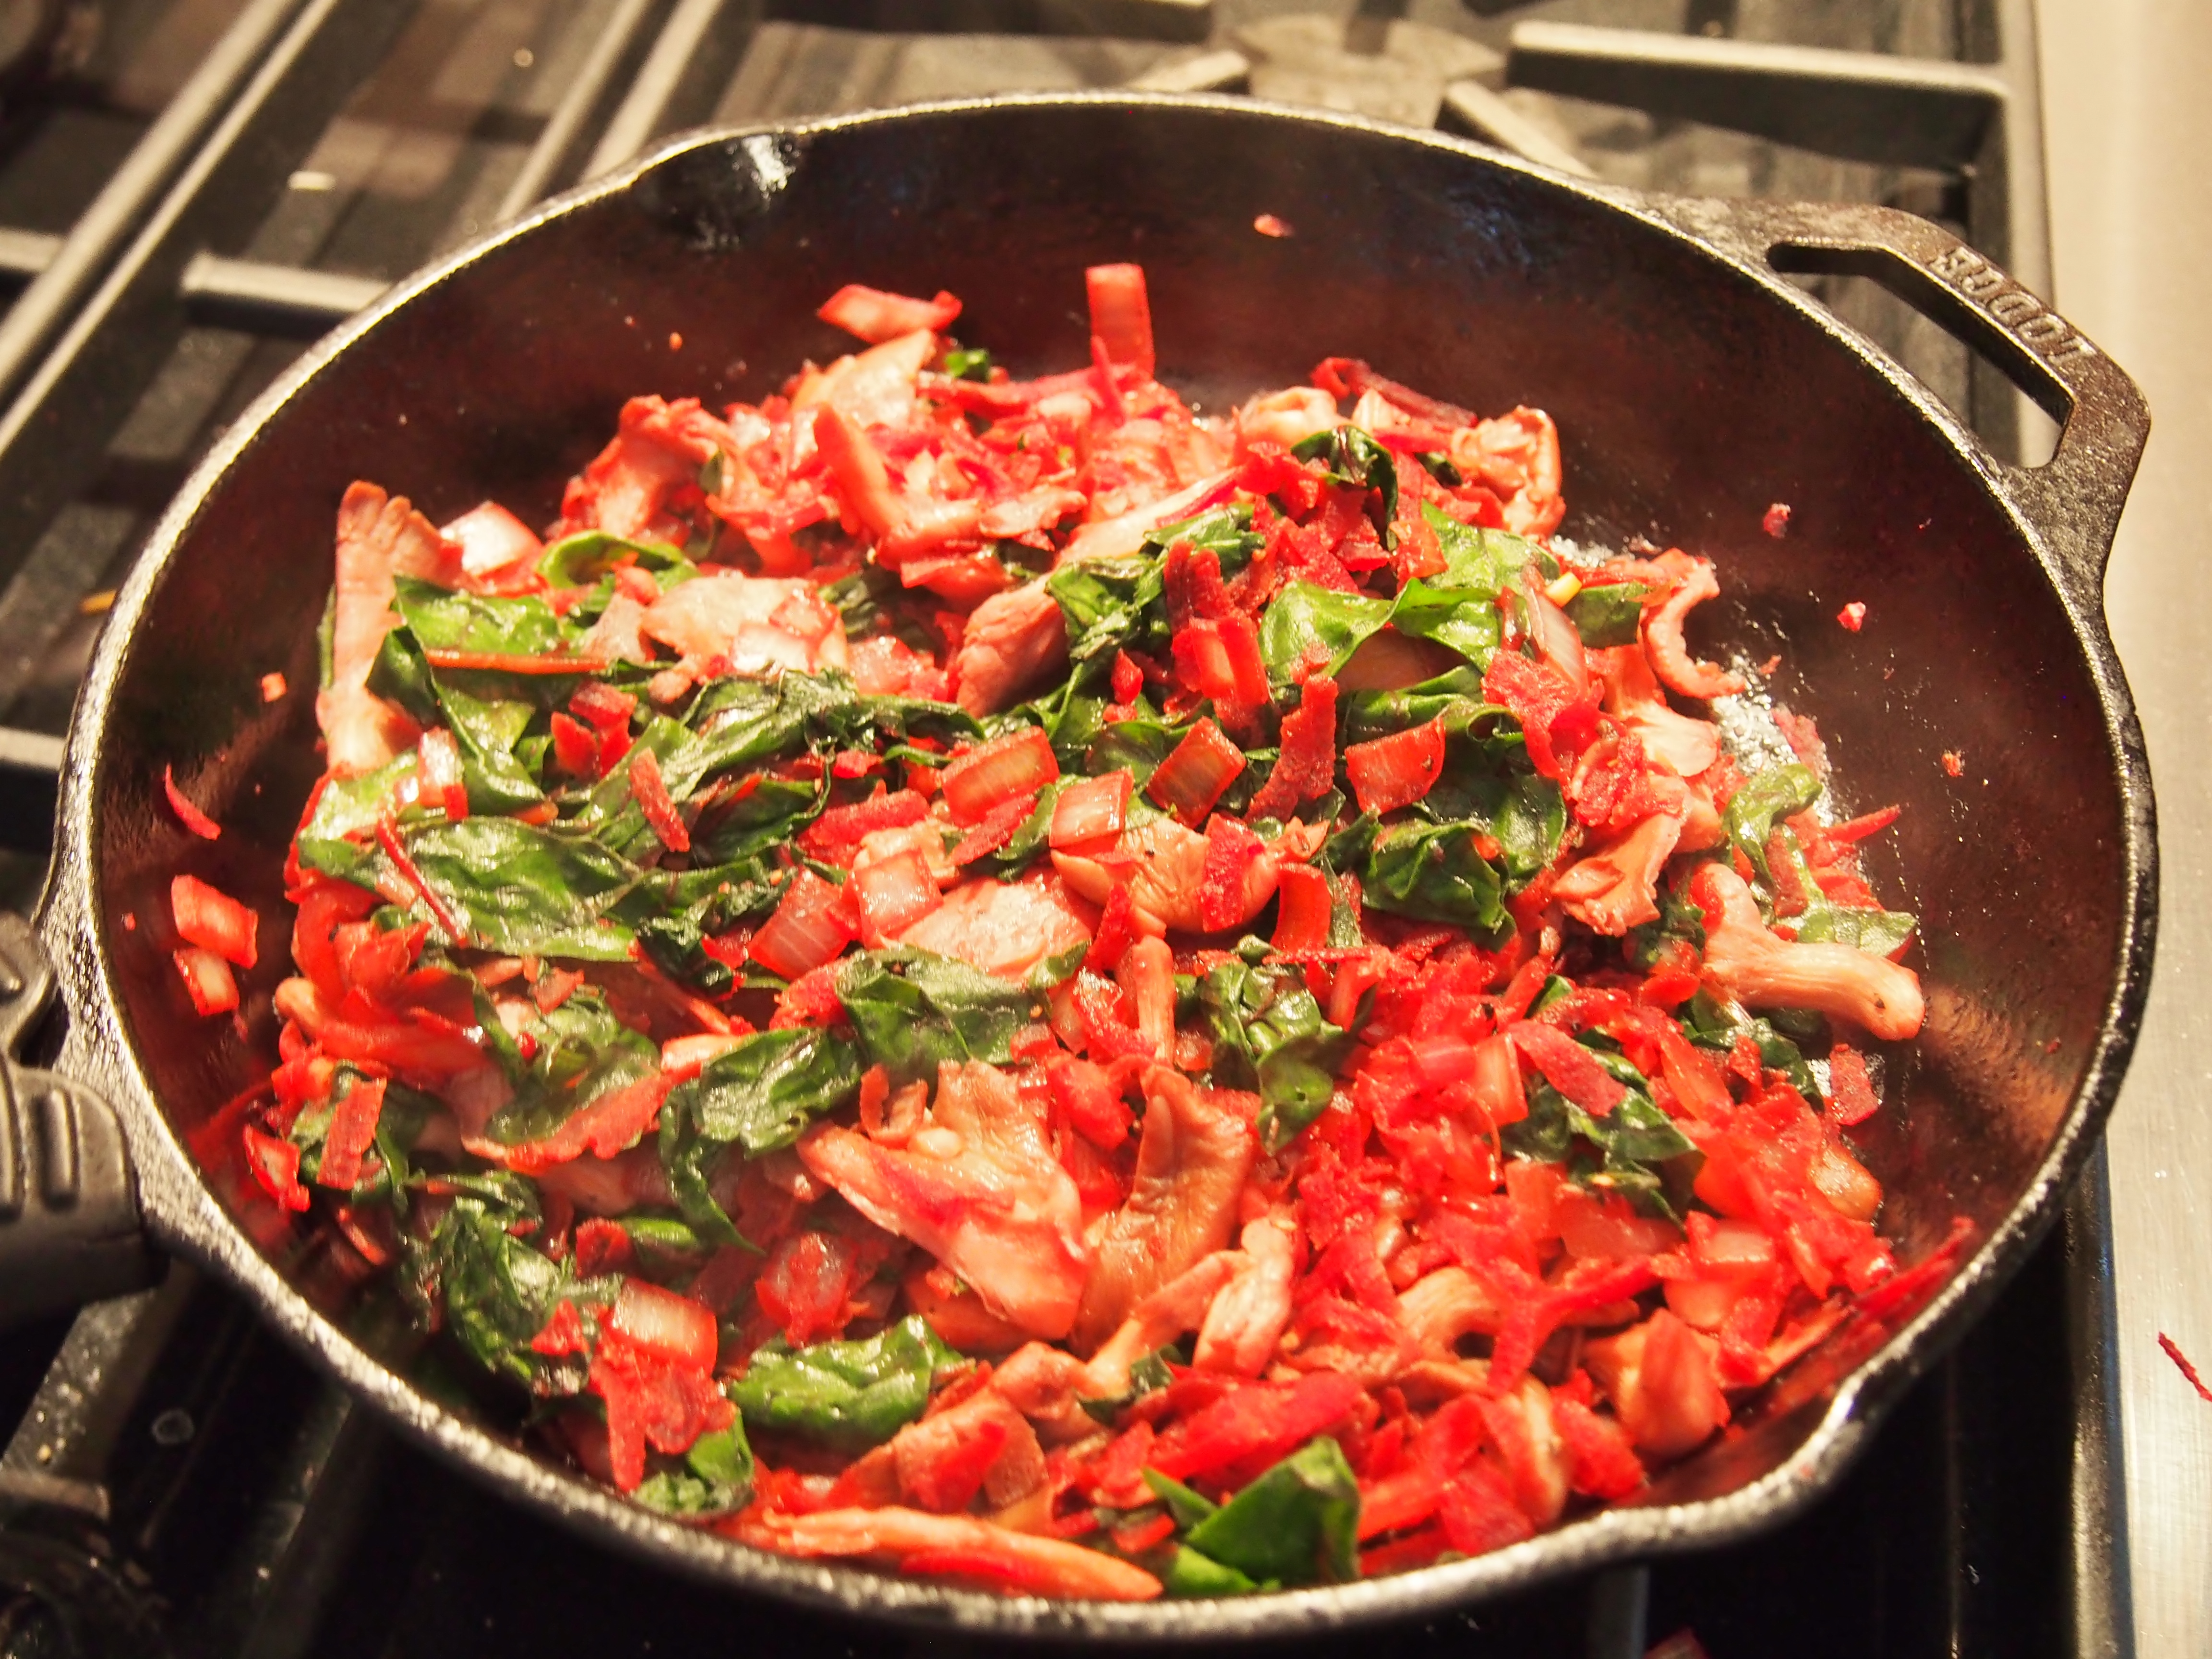
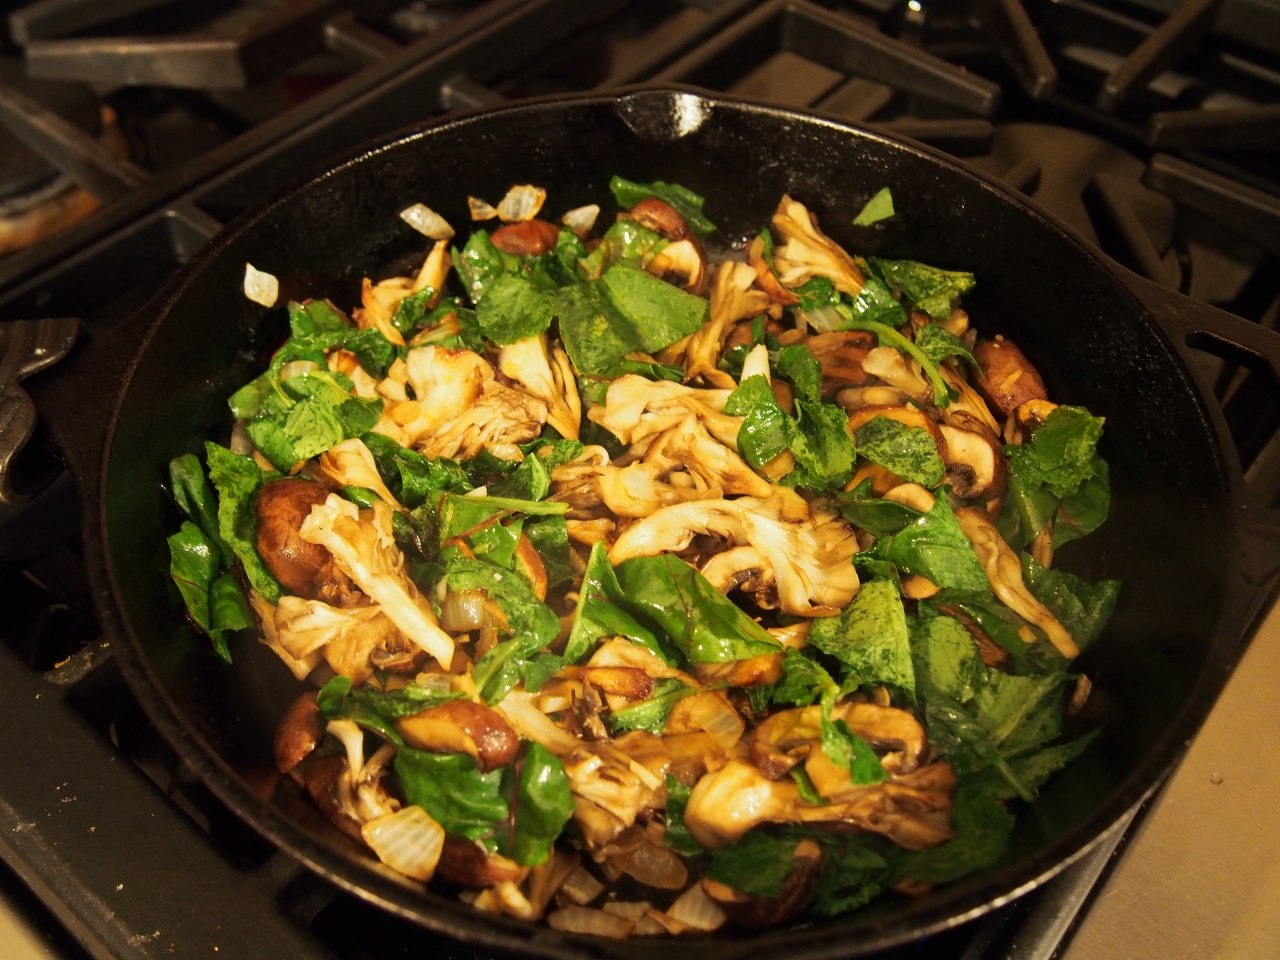
To make the creamy mushrooms, heat a large skillet or sauté pan over medium heat and add the butter and olive oil. Once the butter is melted, add the shallot, and cook until soft, 1 to 2 minutes. Add the mushrooms, salt and pepper to taste, and increase the heat to medium-high. Cook, stirring frequently, for about 5 minutes, until mushrooms have released their liquid and it has cooked off.

Add the wine, reduce the heat to medium-low, scrape up any brown bits and cook off the wine, which will take a minute or two. Stir in the cream, and as soon as it simmers, which will be almost immediately, remove from heat. You’ll be briefly heating this up again so it’s warm when you top the Dutch baby with it.

To make the Dutch baby, in a medium bowl, whisk the eggs, salt, and pepper until well combined. Add the flour and whisk until mostly smooth, then whisk in the milk. It’s okay if there are lumps.

Remove the hot skillet from the oven (use thick hot pads!) and add the three tablespoons of cubed butter. Swirl it around in the pan until it melts. Pour the batter into the pan and, carefully, return the pan to the oven. Cook for 15 minutes when the pancake should be brown in places and rumpled. Sprinkle with Parmesan and return it to the oven for a minute or two to melt the cheese. During the last few minutes of the Dutch baby cooking, heat the mushrooms over medium-low heat so they are warm.

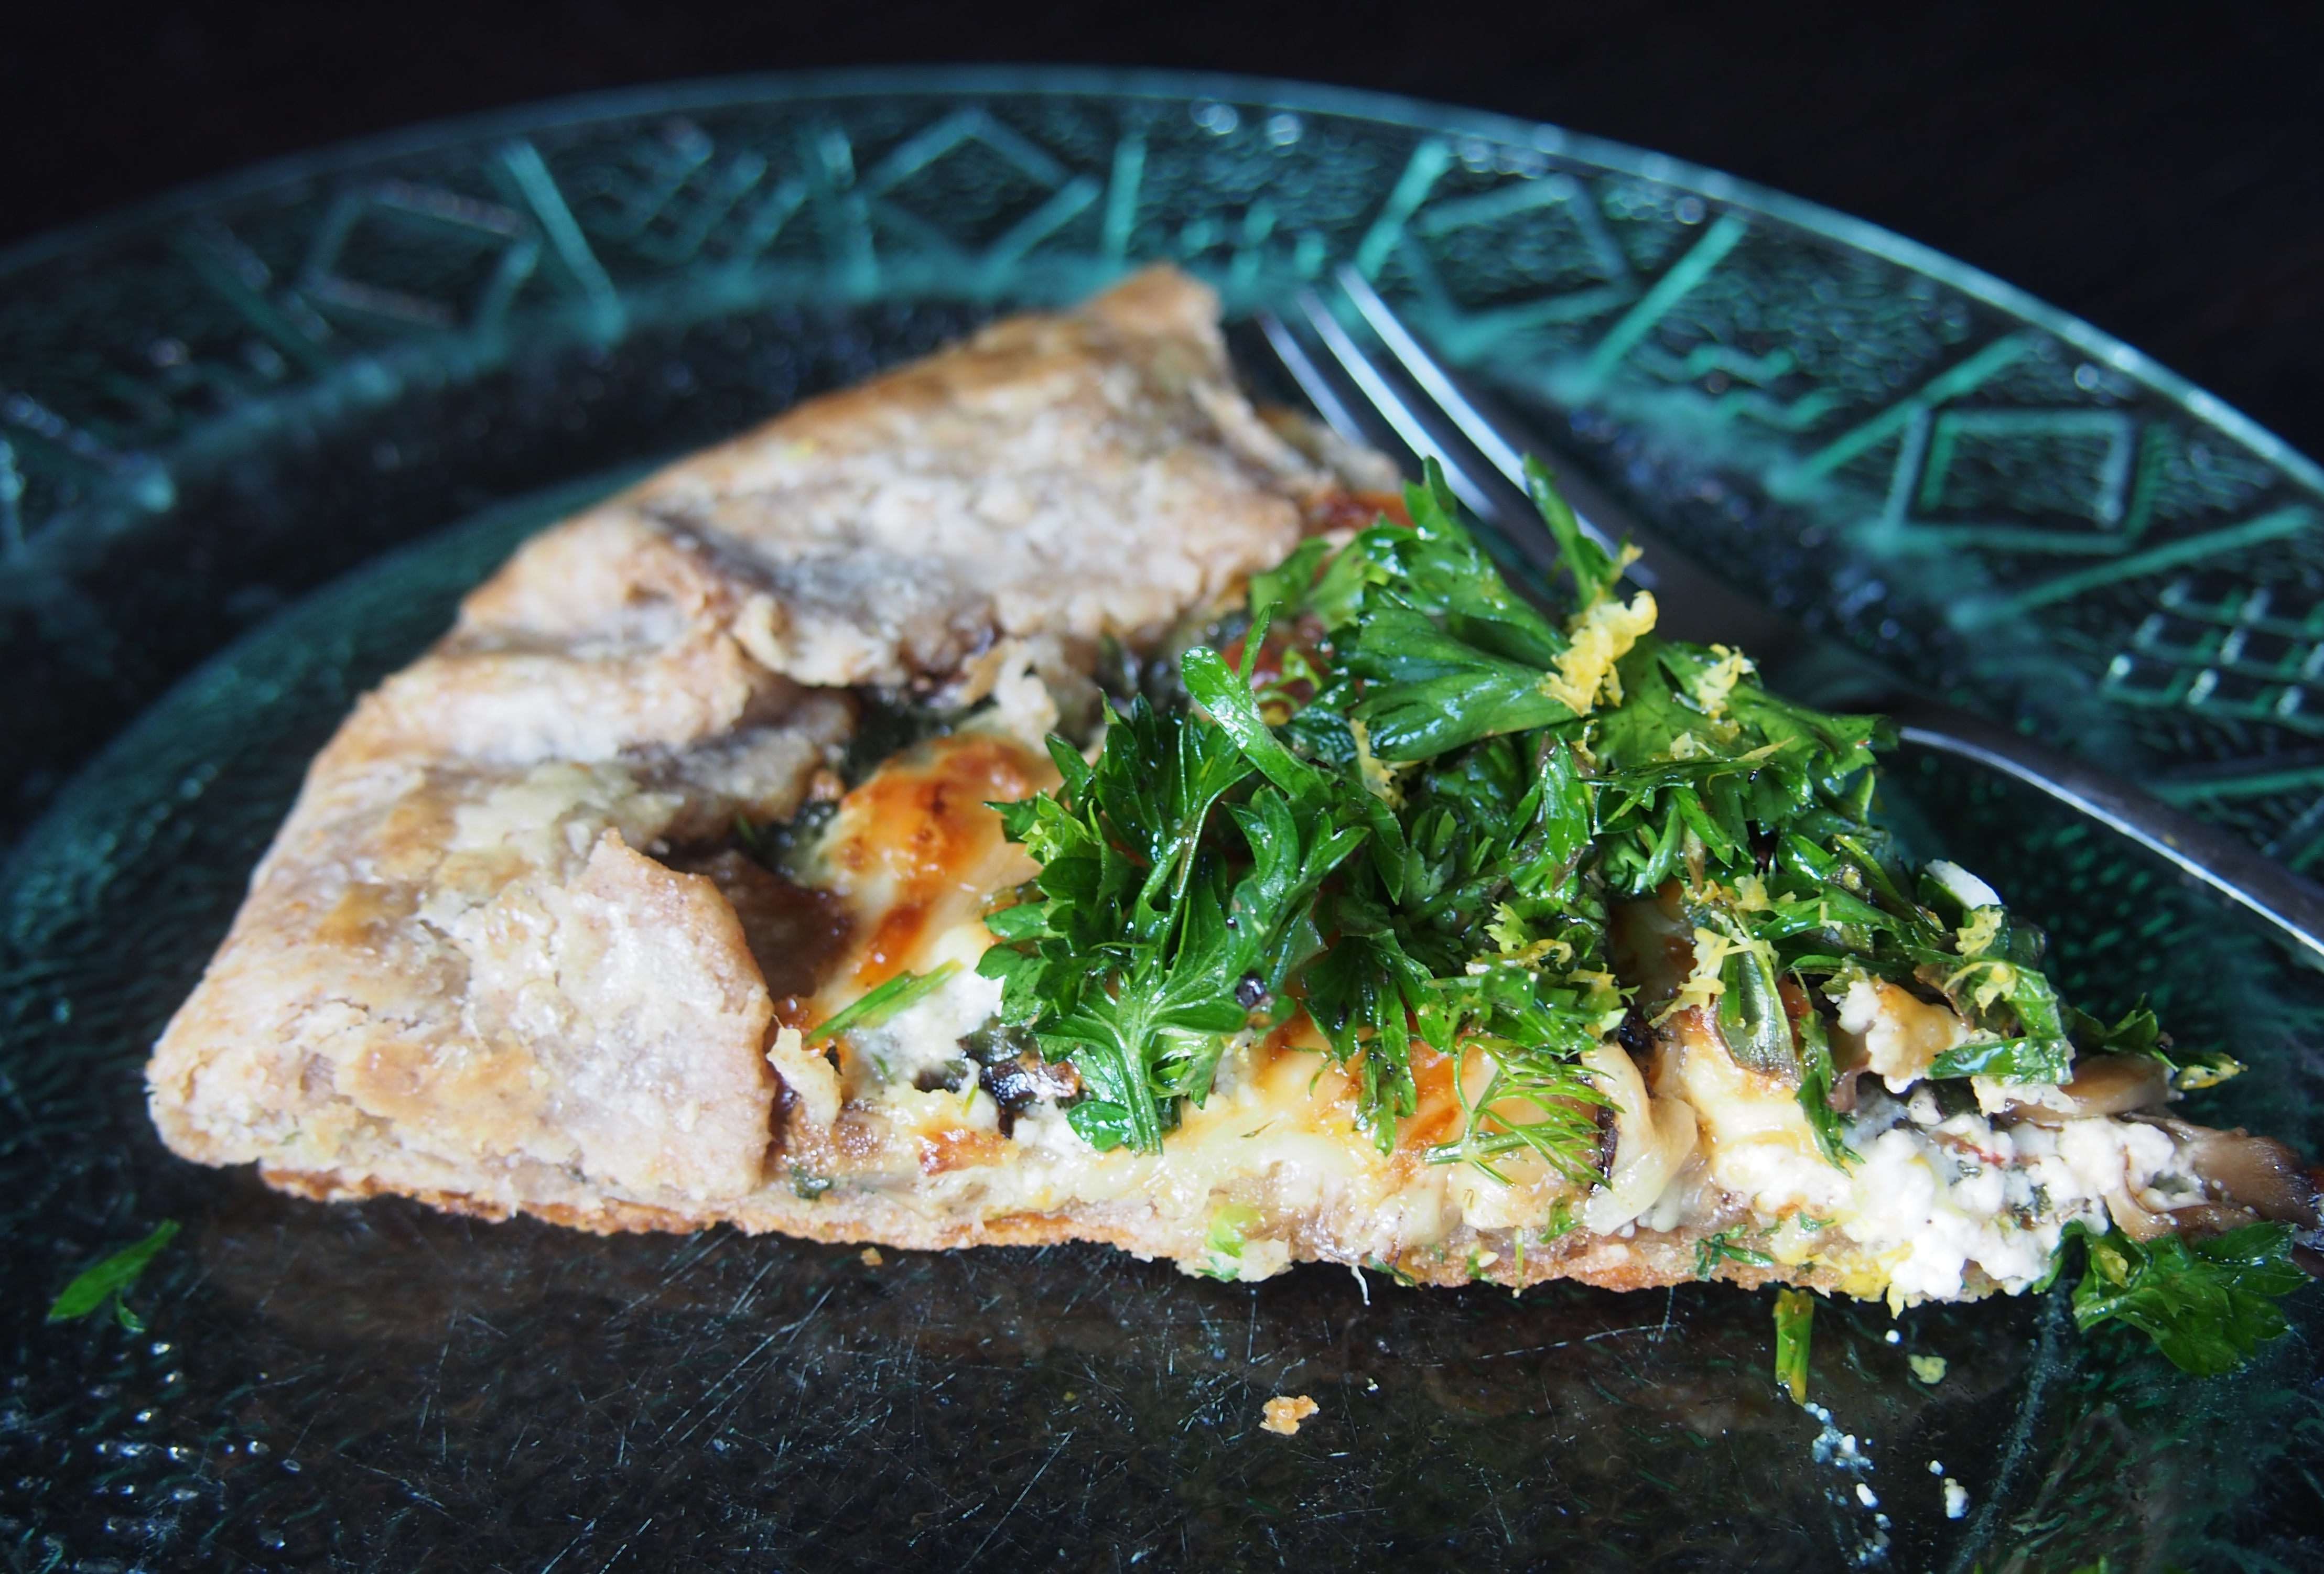
Remove the pancake from oven and spoon the creamy mushrooms over it. Garnish with chives or parsley and cut into wedges. Serves 2 as a main dish with a tossed salad or 4 as a side dish with a main course.

Spaghetti with Cauliflower Meat Sauce


A little over two years ago when I posted this Cauliflower Taco Meat recipe, I mentioned wanting to tweak it with Italian seasonings to be used in things like lasagna, spaghetti sauce, and stuffed peppers. Well, it took me two years and several versions, but it’s finally exactly what I wanted it to be.

This hearty, meaty spaghetti sauce of my dreams will now be in regular rotation in our kitchen. Versatile cauliflower, along with meaty portabellas and healthy omega-3 fat-packed walnuts comes together with herbs and a rich red sauce to create a spaghetti dish I’m confident could hold its own in a cook-off against one made with ground beef.

You could use your favorite red sauce recipe, jarred marinara, or the quick homemade version I included that’s pulled from the headnotes of the Smitten Kitchen’s Stuffed Eggplant Parmesan, which sounds amazing in its own right.

Both the cauliflower meat and the sauce, if you’re making your own, can be done a day or two ahead, which would make this perfect for a weeknight.

To give it an extra dose of veggies, I sautéed some chopped onion and spinach from our garden with a little red wine before adding the sauce and meat. Feel free to leave that out if you’d like. Served over whole wheat spaghetti and topped with a little parmesan (omit for a vegan version) and fresh basil, you’ve got an amazing comfort food meal without the typical saturated fat and cholesterol. What could be better!?! Enjoy!


Spaghetti with Cauliflower Meat Sauce

Cauliflower Meat
3 cups cauliflower florets

1 ½ cups chopped cremini mushrooms

½ cup chopped walnuts

¼ cup tomato sauce

½ teaspoon salt

½ teaspoon fennel seeds

½ teaspoon onion powder

¼ teaspoon dried marjoram

Freshly ground black pepper

Preheat oven to 375 degrees F. Lightly oil a baking sheet.

Place cauliflower, mushrooms, walnuts, tomato sauce, salt, fennel seeds, onion powder, marjoram, and pepper in the bowl of a food processor and pulse on and off until the texture of ground beef. I found it easier to get the right texture by doing this in two batches, half of each ingredient in each batch. The first time I made it I did it all at once and half of it was almost like a paste—still tasted great, but just not the right texture. Transfer mixture to the baking sheet and spread it out in an even layer.

Bake for 30 minutes, stirring once at the half-way point.

Spaghetti or marinara sauce–homemade, jarred, or this quick Smitten Kitchen recipe:
Heat 2 tablespoons olive oil in a pot over medium, add 2 minced garlic cloves, 1 teaspoon kosher salt, and a pinch or three of red pepper flakes, and a little dried oregano, if you wish. Cook for one minute. Add a 28-ounce can crushed tomatoes (it will splatter, be careful) and stir (I used a can of whole San Marzano tomatoes and crushed them with a potato masher once in the pot). Cook at a simmer for 5 to 10 minutes, until you get the saucy consistency you want. This yields 3 cups.

To bring it all together
8 oz. regular or whole wheat spaghetti

1 tablespoon extra-virgin olive oil

½ of a medium yellow onion, chopped

A couple handfuls of fresh spinach, chopped

A splash or two of red wine

Salt & pepper

Freshly grated parmesan cheese, optional

Torn fresh basil leaves for garnish

Place a big pot of well-salted water on the stove and bring to a boil. Cook spaghetti according to package instructions. Drain and return to pot to keep warm.

Meanwhile, heat olive oil in a saucepan over medium heat. Add onions and sauté for several minutes until beginning to soften. Increase heat to medium-high and add spinach and red wine, plus a little salt & pepper. Cook, stirring occasionally, until spinach has wilted and wine has mostly cooked off.

Turn heat back down to medium and add 2 to 2 ½ cups red sauce. Add about half of your cauliflower meat (reserve the rest for another batch). Bring to a simmer and cook until heated through.

Pile pasta into bowls and top with cauliflower meat sauce, parmesan, and basil. Take a big whiff of all this wonderfulness, and dig in. Makes about 4 servings, with enough “meat” left for another batch.

Italian Meatless Balls


I’ve been working on my Christmas menu ever since Thanksgiving and have changed my mind several times, but finally settled on spaghetti and meatballs. Real meatballs will be served for most, with a meatless version for the vegetarian (me) and those wanting to try something different.

I made this Smitten Kitchen meatball recipe for the carnivores and used aspects of the same recipe for the veggie version, with the main ingredients from my Cauliflower Taco Meat as the base. The cauliflower florets, mushrooms, and walnuts are pulsed in the food processor with a little tomato sauce to make what actually looks a lot like raw ground beef. In addition to the ingredients from the meat recipe, I added fennel seeds, oregano, and marjoram for more Italian flavors.

I made these three times, tweaking things a bit with each version, to arrive at what I think are a pretty great vegetarian Italian meatball. I froze them and the “real” meatballs and will serve them in sauce with spaghetti on Christmas. They would also be good in a meatball sandwich, served on pizza, and as an appetizer with dipping sauce (a mixture of apricot preserves, barbeque sauce, and a little Dijon mustard is quite tasty!). Enjoy!


Italian Meatless Balls

3 cups cauliflower florets

1 ½ cups chopped cremini mushrooms

1 ½ cups chopped walnuts

1/3 cup tomato sauce

¼ cup chopped curly parsley

¼ cup freshly grated parmesan or romano cheese

1 teaspoon kosher salt

1 to 1 ½ teaspoons fennel seeds

½ teaspoon dried marjoram

½ teaspoon dried oregano

½ teaspoon onion powder

½ teaspoon garlic powder

¼ teaspoon crushed red pepper flakes

2 eggs, lightly beaten

Preheat oven to 400 degrees F. Line a large baking sheet with parchment and set aside.

Place cauliflower, mushrooms, walnuts, and tomato sauce in bowl of a food processor and pulse until the texture of raw finely ground beef.

Transfer mixture to a large bowl. Add remaining ingredients and mix to thoroughly combine. Form mixture into 2-inch balls; I used a #30 cookie scoop (press meatballs a bit to pack them before rolling into balls). Place on prepared baking sheet.

Bake balls about 20 minutes, until lightly browned and firm. Makes about 30 balls.

Use in spaghetti, meatball sandwiches, as a pizza topping, or with a dipping sauce as an appetizer (we’re talking a mixture of apricot preserves, barbeque sauce, and a little Dijon mustard—yum).

Hungarian Mushroom Barley Soup

A number of years ago my mother-in-law Ginny, who is a wonderful cook, gave me a copy of a soup recipe clipped from the St. Paul Pioneer Press. The name of the soup was missing from the clipping, and on it, Ginny had written “Mushroom Soup.” With her recommendation, I knew it would be good.

A simple soup with uncomplicated ingredients, it surprises you with nuanced flavors and way above run-of-the-mill deliciousness. Each time I’m a bit taken aback by such great results from something this quick and easy—a perfect example of a dish that is so much more than the sum of its parts!

As we’ve been teased with a tinge of fall weather, I decided it was time to share a good soup recipe. After a quick google search for the actual name and origin, I found it was featured in the Pioneer Press in 2011 and is called Hungarian Mushroom Barley Soup. Apparently there was a popular downtown Minneapolis skyway restaurant back in the day called Café Metro and this came from their cookbook. With the large amount of paprika, no wonder it’s got Hungarian in the name!

The only tweaks I made to this super healthy soup were to decrease the broth from 10 to 8 cups, used fresh herbs instead of  dried, and included a combination of smoked and regular paprika. With the finishing touches of fresh lemon juice and dill, the depth of flavor will satisfy and I’ll bet it’ll be on your table more than once this soup season. Enjoy!


Hungarian Mushroom Barley Soup

Adapted from the St. Paul Pioneer Press

1 medium onion, cut into 1/4-inch dice

1 tablespoon olive oil

1 1/2 cups green pepper, cut into 1/4-inch dice

1 3/4 cups carrots, peeled and cut into 1/2-inch dice

1 tablespoon fresh thyme or 1 teaspoon dried

2 3/4 teaspoons paprika (I used a mixture of smoked and regular)

4 cups mushrooms, cleaned and sliced (either cremini or button work well)

1/4 cup tomato paste

8 cups vegetable broth

2/3 cup uncooked barley

2 teaspoons salt

1/2 teaspoon pepper

1/4 cup freshly squeezed lemon juice

2 ½ tablespoons fresh dill or 3/4 teaspoon dried dill

In a large stockpot, sauté the onion in olive oil until soft. Add green pepper, carrots, thyme and paprika. Cook over medium heat for 5 minutes, stirring occasionally. Add mushrooms and tomato paste. Cook for 5 minutes or until mushrooms release their liquid. Add broth. Bring to a boil. Add barley. Reduce heat and simmer for 45 minutes or until the barley is tender. Season with the salt and pepper. Stir in lemon juice and dill. Ladle into soup bowls. Makes about 10 servings.

Cauliflower Taco Meat


The humble cauliflower. That funny looking vegetable I hated as a child, continues to surprise me. First there was cauliflower pizza crust, then Buffalo cauliflower, cauliflower steaks, and now, wait for it…cauliflower taco meat!

Replacing the spicy ground beef in traditional tacos, this mixture of cauliflower, mushrooms, walnuts and bold seasonings amps up the deliciousness and it’s a healthy mix of superfoods to boot! What’s not to love? And I swear, even if you think you don’t like cauliflower, mushrooms, or walnuts, if you like tacos, you will like this.

I stumbled upon the recipe at Pinch of Yum, one of my favorite food blogs (and their photography is amazing!). Intrigued, I knew what I was going to make with that head of cauliflower in the fridge. The only thing that made me hesitate was the two cups of walnuts the recipe called for. I know walnuts are super healthy, full of good fats, omega 3s, and loaded with antioxidants, but they also pack a wallop of calories, which I certainly don’t need. Since mushrooms are so meaty, especially cremini mushrooms, I decided to replace half the walnuts with them. The result wowed us!

And don’t limit this yummy mixture to tacos; it would make a great filling for burritos, quesadillas, enchiladas, frittatas, taco salad and on and on. My mind is now working on a way to make this, with different seasonings, into a mixture for Italian recipes, lasagna, spaghetti sauce, meatballs, and stuffed peppers. And sloppy joes! I bet that would be wonderful!

The taco “meat” ingredients involve just a quick series of pulses in the food processor and then a half hour of baking, followed by a couple minute broil, then a sprinkling of fresh lime juice. While it’s in the oven, you can prep your taco accompaniments, so this is very doable on a weeknight after work. Plus, it reheats really well, and leftovers will not go to waste. Enjoy!

Cauliflower Taco Meat

Adapted from this Pinch of Yum recipe

3 cups cauliflower florets

1 cup chopped walnuts

1 cup chopped cremini mushrooms

2 chipotle peppers in adobo sauce

1/4 cup tomato sauce

1 tablespoon chili powder

1 teaspoon cumin

1 teaspoon onion powder

1/2 teaspoon salt

Fresh squeezed lime juice

Preheat oven to 375 degrees F. Lightly oil a baking sheet.

Place all ingredients except lime juice in the bowl of a food processor and pulse on and off until the texture of cooked ground beef. I found it easier to get the right texture by doing this in two batches, half of each ingredient in each batch. The first time I made it I did it all at once and half of it was almost like a paste—still tasted great, but just not the right texture. Transfer mixture to the baking sheet and spread it out in an even layer.

Bake for 30 minutes, stirring once at the half-way point. After the 30 minutes, turn oven to broil and broil 8-12 inches from broiler for a minute or two. Watch carefully so it doesn’t burn. Drizzle with a tablespoon or two of lime juice and toss to distribute it.

That’s it. The “meat” is ready to use in tacos, burritos, taco salads, enchiladas, quesadillas, or whatever your heart desires. Reheats well and keeps several days in the fridge. Makes about 4 servings.

Vegetarian Swedish Meatballs and Gravy


Recently I came across a recipe for vegetarian Swedish meatballs and my mouth started watering. I’ve never had the real thing, but I imagine they’d be delicious. This recipe, however, didn’t have the traditional allspice and nutmeg included, so I moved past it and searched for other versions.

Ultimately, I ended up adapting a non-vegetarian recipe, one called The Best Swedish Meatballs from the new-to-me blog, The Recipe Critic. I replaced the ground beef with a mixture of wild rice, cremini mushrooms and cauliflower, then added a little ricotta for richness (you could also use Greek yogurt). To save time, I purchased already-cooked wild rice, which you can find in either cans or pouches. Just make sure it’s all wild rice, not a blend including other types of rice.

But the gravy is what makes this dish truly special. Oh, the gravy! Luxurious, I tell you, with unexpected oomph from Worcestershire sauce and Dijon mustard. Quick and easy to make, whip it up while the meatballs are baking.

You certainly can eat the meatballs and gravy on their own, but served over mashed potatoes or egg noodles makes a complete, comfort food meal—perfect for a cold winter’s day! Enjoy!


Vegetarian Swedish Meatballs and Gravy

Adapted from The Recipe Critic

Meatballs:
2 cups cooked wild rice

1 ½ cups chopped mushrooms, cremini work well—nice and meaty

3 cups cooked cauliflower florets

½ cup ricotta cheese or Greek yogurt

¼ cup finely chopped onion

2 eggs, lightly beaten

½ cup bread crumbs, preferably whole wheat

¾ teaspoon garlic powder

½ teaspoon salt

¼ teaspoon allspice

¼ teaspoon white pepper

1/8 teaspoon nutmeg

¼ cup chopped fresh parsley, divided

Olive oil spray or olive oil

Gravy:
4 tablespoons butter

3 tablespoons flour

2 cups vegetable broth (I used Edward & Sons Not-Beef Bouillon Cubes)

½ cup milk or half-n-half

1 tablespoon Worcestershire sauce (the Annie’s brand is vegetarian)

1 heaping teaspoon Dijon mustard

Salt and freshly ground black pepper to taste

Preheat oven to 425 degrees F.

Pulse 1 ½ cups of the wild rice, the mushrooms, and cauliflower in food processor until blended, but with some texture left. Transfer to a large bowl and stir in the remaining half cup of wild rice. Add the ricotta or yogurt, onion, eggs, bread crumbs, garlic powder, salt, allspice, white pepper, nutmeg, and 1/8 cup of the parsley. Mix until thoroughly combined.

Roll 1 ½ – 2 tablespoon portions of mixture into balls and place on a parchment-lined baking sheet. I used a #30 cookie dough scoop, which worked perfectly. Spritz balls with olive oil spray or brush with a little olive oil. Bake for 20 minutes, rotating pan at the halfway point.

Meanwhile, make gravy. Heat a large skillet over medium heat and add butter and flour. Whisk until it turns light brown. Slowly stir in broth and milk. Add Worcestershire and Dijon mustard and bring to a simmer, whisking until gravy starts to thicken. Season with a little salt and pepper, to taste.

Add cooked meatballs to the skillet and simmer for a couple minutes (you’ll have leftover meatballs). Sprinkle with remaining parsley.

Serve over mashed potatoes or egg noodles. Makes about 4 servings.

Caramelized Onion and Mushroom Quesadillas with Homemade (or not) Corn Tortillas

OLYMPUS DIGITAL CAMERA
After a weekend of pain from an abscessed tooth and then a soft foods diet the following weekend (because of stiches from a surgical root canal), I’ve finally been able to enjoy eating again. Real food, not mush. Oh, the simple pleasures in life we take for granted!

Ever since I bought my tortilla press last fall, I’ve been wanting to incorporate homemade corn tortillas into a blog post. Looking through the archives, I found more taco recipes than I realized, so that led me in the quesadilla direction instead.

The homemade tortillas are extremely easy and bring a fresh aspect that I’ve never experienced in a corn tortilla before. But by no means do you need to make homemade tortillas to enjoy this recipe. Good quality, fresh store-bought tortillas will work just fine, as will fresh flour tortillas.

Corn tortillas are made with masa harina, which looks similar to corn meal, but is not the same thing. Do not substitute corn meal or regular corn flour—they’re produced from different types of corn and are processed differently and won’t produce the same results.

I’ve seen masa harina in the international section and the baking aisle of large supermarkets in 8 pound bags. Knowing it would probably take me years to use that much, I ordered a 24-oz. bag of Bob’s Red Mill organic masa harina from Amazon. With organic, you can be assured it’s made from non-GMO corn.

OLYMPUS DIGITAL CAMERA

OLYMPUS DIGITAL CAMERA

OLYMPUS DIGITAL CAMERA
For a time-saving convenience, I used a pre-shredded bag of slaw (Trader Joe’s organic), but if you have the time, by all means, shred your own. The slaw can be mixed up the day before (I think it tastes even better after a day in the fridge) and the caramelized onions and the mushroom mixture can all be made a day or two ahead of time as well. With all the bold flavors in this recipe, if you choose to go vegan by omitting the cheese, you’ll still have a delicious meal. Enjoy!
OLYMPUS DIGITAL CAMERA

Caramelized Onion and Mushroom Quesadillas with Homemade (or not) Corn Tortillas

Slaw:
One 9 oz. bag pre-shredded coleslaw (green cabbage, red cabbage, carrot), or shred your own

2 scallions, thinly sliced

1 teaspoon celery seed

¼ cup apple cider vinegar

1 tablespoon whole grain mustard

1 tablespoon pure maple syrup

1 tablespoon orange juice, preferably fresh-squeezed

¼ cup extra-virgin olive oil

Salt and freshly ground black pepper, to taste

Whisk together vinegar, mustard, maple syrup and orange juice. Slowly drizzle in olive oil, while whisking, until fully incorporated.

Place coleslaw mixture, scallions, and celery seed in a large bowl and toss to combine. Pour some of the dressing over and mix. Add more dressing as desired (you probably won’t use all of it). Season to taste with salt and pepper. Cover and chill while you make the filling and tortillas, or overnight for even better flavor.

Tortillas:
1 cup masa harina (see my babbling above for more info on masa harina)

Pinch of salt

¾ cup hot, but not boiling water

In a medium mixing bowl, combine the masa harina and salt. Stir in the hot water until combined. Knead with your hands for about a minute. It should feel smooth, but not sticky, and easily form a ball. If dough feels dry and crumbly, add a tablespoon of water. If too sticky, add a tablespoon more masa harina.

Cover the bowl and set aside for about a half hour while you make the filling (recipe below). After the dough has rested and your quesadilla fillings are made, divide dough into 8 pieces and roll each into a ball (they will each be about the size of a ping pong ball).

Cut the sides open of a quart sized zip-lock bag. Open your tortilla press and lay open bag on press. Place a ball of dough in the center of press and fold the other side of the bag over the dough. Close the top of the press over the dough and push down the handle to flatten the ball.

Heat a dry cast iron skillet over medium-high heat. When hot, lift the top half of the bag off the flattened dough and peel the dough off the other layer of plastic and place in the hot pan. Cook a minute or two and flip, cooking another minute or two more. Transfer to a clean tea towel and fold up to close.

Repeat with remaining dough, keeping cooked tortillas wrapped in the tea towel.

Filling:
2 tablespoons extra virgin olive oil, divided

1 large onion, thinly sliced

½ tablespoon brown sugar

2 tablespoons balsamic vinegar

8 oz. cremini (baby portabella) mushrooms, thinly sliced

2 cloves garlic, minced

½ jalapeño pepper, minced (use as many of the seeds you’d like to get desired amount of heat)

Shredded cheese of choice, I used a Swiss/gruyere mixture, or omit cheese for a vegan version

Heat one tablespoon oil in a cast iron or other heavy skillet over medium-low heat. Add onions and cook, stirring occasionally, for about 10 minutes. Stir in brown sugar and cook another minute or two. Add balsamic and cook for another 5 minutes or so, stirring occasionally. Transfer onions to a plate and set aside.

Wipe out pan and place over medium heat and add second tablespoon of olive oil. When hot, add mushrooms and cook for several minutes, until they start releasing a little moisture. Stir in garlic and cook a few more minutes. Add minced jalapeño and cook another couple of minutes. Transfer to a plate and set aside.

To assemble quesadillas, heat a cast iron skillet or grill pan over medium heat, brush with a little olive oil. Top one tortilla with some of the onion mixture, followed by mushroom mixture, and then cheese, if using. Place in pan and cook several minutes (I cover the pan to help the cheese melt). Once cheese is melted and bottom of tortilla is getting a little crisp, place another tortilla on top and press down. Carefully flip quesadilla and cook other side for another several minutes.

Transfer cooked quesadilla to a plate and cut into wedges. Serve topped with chilled coleslaw. Makes 4 quesadillas.

Mushroom, Beet and Swiss Chard Crêpes

OLYMPUS DIGITAL CAMERA
This recipe came about with a need to use a few produce items in the fridge that wouldn’t last much longer. Swiss chard and mushrooms became a staple combination in our house last summer using the beautiful chard we grew. Missing those flavors, I picked up some chard and oyster mushrooms at the store with the intention of using them in that night’s dinner.

Fast-forward almost a week and I still hadn’t done that. Pete working overtime and then my being out of town for work got in the way. Last Thursday I remembered those delicious ingredients while at work and planned out that night’s meal in my head. A little fresh parmesan and some beets would go into the mixture, along with my new favorite, whole wheat angel hair pasta. It was a great week night dinner with leftovers for lunch the next day.

With beets being such a tasty addition to that Swiss chard-mushroom mix, I wanted to make it again, but amp it up a bit given the extra time I had for cooking on the weekend. Crêpes came to mind, thinking this would be the perfect filling for thin and savory French pancakes.

Because of the red and green color combination, it also seemed a fitting dish for the Christmas season. A dollop of crème fraiche and a sprinkling of lemon zest on top, and you’ve got yourself one visually appealing and scrumptious meal. And it’s special enough for company, which I hope you’ll have lots of during the holidays. Enjoy!
OLYMPUS DIGITAL CAMERA

Mushroom, Beet and Swiss Chard Crêpes

If you want to give your crêpes an extra pretty touch, reserve a ¼ cup of the shredded beets and a little Swiss chard, chopped extra fine, to add along with the crème fraiche and lemon zest for garnish. The unfilled crêpes can be made ahead of time, wrapped and refrigerated for a day or two or frozen, tightly-wrapped, for up to a month.

1 tablespoon extra-virgin olive oil

½ a large onion or one whole small onion, chopped

1-2 cloves garlic, minced

8 oz. mushrooms (maitake, oyster, crimini), or a mixture of all three, chopped

½ a large bunch, or whole bunch if small, Swiss chard, large rib removed and sliced into ribbons

1 large beet, peeled and shredded

Salt & pepper, to taste

8 oz. fontina cheese, shredded (gruyère or parmesan would work as well)

Crêpes, recipe follows

Crème fraiche

Micro-planed zest of one lemon

Heat the olive oil in a large skillet over medium heat. Add the onions, sprinkle with a pinch of salt, and cook until starting to soften, about 3 minutes. Add the garlic and cook another minute or two. Stir in the beets and mushrooms and cook about 2 more minutes. Mix in the Swiss chard and cook another 2-3 minutes or so, until the chard is tender. Add additional salt, along with freshly ground black pepper, to taste.

To serve, place a cooked crêpe in a skillet over medium heat and sprinkle about a quarter cup of the shredded cheese down the center (the first-cooked side of the crêpe is usually prettiest, so make that the outside). Cover pan and let crepe warm and cheese melt, about a minute. Spoon chard-mushroom filling down the center and roll. Top with a dollop of crème fraiche and a sprinkling of lemon zest.

Alternately, you could preheat the oven to 375 degrees F and fill crêpes with cheese and filling, roll, and place in a baking dish. Bake until hot, about 20 minutes. Move crêpes to serving plates and garnish as described above.

Crêpes
Recipe from Myra Goodman’s The Earthbound Cook, one of my favorite cookbooks.

1 cup plus one tablespoon, whole wheat pastry flour

1/8 teaspoon salt

2 eggs, lightly beaten

1 ¼ cup whole milk

2 tablespoons butter, melted

Additional melted butter for the crêpe pan

In a medium bowl, whisk together flour and salt. Add eggs and milk and whisk until mixed. Whisk in melted butter and continue whisking until the batter is very smooth. Cover and refrigerate for 1-3 hours.

Place a cast iron skillet or crêpe pan over medium heat and when hot, brush with some melted butter. Pour or ladle ¼ cup of batter into the center of the pan, lift the pan off the stove, and tilt and swirl the pan so that the batter spreads thinly across the bottom of the pan in a widening circle; don’t worry if the crêpe isn’t a perfect circle (and in my experience, the first crêpe never turns out pretty, but the rest do).

Cook until tiny bubbles begin to appear in the crêpe batter; depending on how hot your pan is, the crêpe will be ready to flip in 30-45 seconds. With a spatula, lift up a corner of the crêpe to check if the cooked surface is lightly golden around the edges, and if so, flip. Cook the second side about 30 seconds. Remove crêpe to a platter, with a sheet of wax paper or parchment between each crêpe. Continue with remaining batter. Makes about 8 crêpes.

Swiss Chard and Mushroom Galette

OLYMPUS DIGITAL CAMERA
2016 was the first summer Swiss chard has graced our garden, but it certainly won’t be the last. I’ve had fun incorporating it into many dishes, but my favorite is to pair it with mushrooms. After recently cutting several large bunches of chard and enjoying it with mushrooms in pasta, I decided to look for a little different recipe for this delicious combination. The one that rose to the top after googling “Swiss chard mushroom recipes,” was a savory galette from Epicurious.

I’ve made dessert galettes several times, using pre-packaged puff pastry, for an easy and impressive (looking and tasting) fruit-filled treat, but a savory galette with homemade crust was new to me. No stranger to pastry from scratch recipes, this didn’t intimidate, but excited me, especially because it included whole wheat flour—that always makes me feel a little less guilty about a butter crust. And if pastry from scratch intimidates you, a galette is a great way to hone your skills because the rolled shape needn’t be exactly round like a pie.

The dough needs to chill for at least two hours and can be kept in the fridge for up to two days, an ideal make-ahead aspect to this recipe. I made the dough in the morning for a same-day supper.

Don’t be tempted to skip the little herb salad topping after the galette is cooked—it adds another layer of flavor and really boosts this to rock star recipe status. Enjoy!OLYMPUS DIGITAL CAMERA

OLYMPUS DIGITAL CAMERA

Swiss Chard and Mushroom Galette

Slightly adapted from this recipe

Dough:
1 cup all-purpose flour

1 cup whole wheat flour

1 teaspoon kosher salt

8 tablespoons (one stick) chilled unsalted butter, cut into pieces

1 tablespoon apple cider vinegar

Galette:
3/4 cup ricotta

¼ cup Boursin cheese

3 tablespoons olive oil, divided

4 ounces maitake mushrooms, torn, and/or crimini mushrooms, thinly sliced

1 garlic clove, finely chopped

1 large bunch Swiss chard, ribs and stems removed, leaves cut into bite-size pieces

1/4 cup grated parmesan cheese

All-purpose flour (for parchment)

1 large egg, beaten to blend

Salt and freshly ground black pepper

1 cup mixed fresh tender herbs (such as flat-leaf parsley, cilantro, dill, and/or chives)

1 teaspoon finely grated lemon zest

1 teaspoon fresh lemon juice

Flaky sea salt (such as Maldon)

For whole wheat dough:
Pulse all-purpose flour, whole wheat flour, and salt in a food processor to combine. Add butter and pulse until mixture resembles coarse meal with a few pea-size pieces of butter remaining.

Transfer mixture to a large bowl; drizzle with vinegar and 1/4 cup ice water. Mix with a fork, adding more ice water by the tablespoonful if needed, just until a shaggy dough comes together; lightly knead until no dry spots remain (do not overwork). Pat into a disk and wrap in plastic. Chill at least 2 hours.

DO AHEAD: Dough can be made 2 days ahead. Keep chilled.

For galette:
Preheat oven to 400°F. Mix ricotta and Boursin; set aside.

Heat 1 tablespoon oil in a large skillet over medium-high heat. Add mushrooms; season with salt and pepper and cook, stirring occasionally, until golden brown and crisp, about 5 minutes. Transfer to a small bowl.

Heat 1 tablespoon oil in same skillet over medium heat. Cook garlic, stirring, until fragrant, about 30 seconds. Add half of chard, season with salt and pepper, and cook, tossing, until slightly wilted. Add remaining chard and cook, tossing occasionally, until completely wilted, about 4 minutes. Remove from heat; season with salt and pepper. Set aside.

Roll out dough on a lightly floured sheet of parchment to a 14″ round about 1/8″ thick. Transfer on parchment to a baking sheet. Spread three-fourths of ricotta/Boursin mixture over dough, leaving a 1 1/2″ border. Top with reserved chard, then mushrooms. Dollop remaining ricotta over vegetables. Sprinkle with parmesan. Bring edges of dough up and over filling, overlapping as needed, to create a 1 1/2″ border; brush crust with egg. Bake galette, rotating once, until crust is golden brown and cooked through, 35–40 minutes. Let cool slightly on baking sheet.

Toss herbs with lemon juice and remaining 1 tablespoon oil in a small bowl; season with pepper. Top galette with herb salad, zest, and sea salt. Makes 4-6 servings.

Mushroom Lasagna with Butternut Squash Sauce

OLYMPUS DIGITAL CAMERA
It’s been many years since I’ve made the main Thanksgiving meal, but this year I have the honor.  And of course, being vegetarian, Thanksgiving dinner at my house is anything but traditional. I remember one year making what essentially was a pile of veggies and seitan in a delicious sauce, covered with puff pastry, then baked (it was sort of supposed to resemble the shape of a turkey). It was a huge hit, but sadly, I didn’t keep the recipe and have never been able to find it, despite endless Google searches.

This year, the usual hosts are going to another side of their family for the big celebration, so we, I’m happy to say, will take over the hosting duties for the rest of the family. With a busy schedule leading up to the holiday, basing our meal around a entrée that won’t require a ton of advanced prep time and will allow me to actually participate in the appetizers and drinks part of the party, is important.

That’s the nice thing about lasagna. You can prep all the ingredients ahead of time and pop it in the oven while you and your guests enjoy time together before sitting down to dinner. The only extras needed are a salad and maybe some good quality bread; no menagerie of side dishes required. But not a conventional lasagna. I want something seasonal, with butternut squash and mushrooms, that isn’t too rich.

OLYMPUS DIGITAL CAMERA

Don’t forget to roast the seeds!

OLYMPUS DIGITAL CAMERA

OLYMPUS DIGITAL CAMERA
I looked at a lot of recipes and most had a béchamel or white sauce in place of the typical tomato, which can be heavy. The recipe I chose to adapt replaces the béchamel with a squash sauce that is amazing! The lemon zest just takes it over the top and makes for a truly unique and memorable (in a very good way) dish.

It’s also a very adaptable recipe. You can change the cheese if you can’t find Gruyere, change up the mushroom variety to what’s accessible, and use any hearty green. You can even add some veggie sausage if you want a more robust meal. I made a half recipe in an 8 x 8 pan as a taste test and it’s definitely holiday company-worthy, and I’m quite sure no one will miss the meat. Enjoy!
OLYMPUS DIGITAL CAMERA

Mushroom Lasagna with Butternut Squash Sauce

Adapted from this recipe
Can easily be halved and cooked in an 8 x 8 pan—cooking time remains the same

1 pound no-boil lasagna noodles, preferably whole wheat

2 to 2 1/2 pound butternut squash (or 2 pounds chopped squash)

Extra-virgin olive oil

Salt and pepper to taste

1 large bunch chard, kale, or beet greens, washed, ribs/stems removed and cut into thin ribbons

1/2 pound cremini mushrooms, cleaned and sliced

½ pound oyster mushrooms, cleaned and broken apart

3 cloves garlic, finely minced

1/4 dry white wine

1 cup milk (between 2% and whole), plus additional if needed

1 teaspoon freshly grated nutmeg

Zest of one medium-sized lemon

1 teaspoon minced fresh thyme leaves, plus extra for the top of the lasagna

2 cups shredded Gruyere cheese

½ cup shredded parmesan

Preheat the oven to 375 degrees F. Peel and seed the squash, then cut into 1-inch cubes and toss with 1 tablespoon olive oil and a generous amount of salt and pepper. Spread on a baking sheet and roast for 40 minutes or until soft, tossing a couple times to ensure even cooking. Remove from oven and set aside to cool a bit.

While the squash is cooking, heat a tablespoon of olive oil over medium-high heat in a 10-12-inch frying pan. When the oil is hot, add the mushrooms. Cook without stirring until brown, about 5 to 7 minutes. Turn them over and cook for an additional 3-4 minutes. Reduce the heat to medium and stir in the garlic. Cook, stirring frequently, until the garlic is fragrant, about 3 minutes. Add the chopped chard leaves and the white wine and cook until the greens are tender and wilted. Turn off the heat and season the vegetables lightly with salt and pepper.

Place the cooled squash into a large bowl and add 1/2 cup milk, the nutmeg, lemon zest and thyme. Use an immersion blender to puree the mixture, adding the remaining milk as you go (this can also be done in a regular blender). Add extra milk if necessary to make the sauce smooth and creamy, but not too thin. Add salt and pepper to taste.

Lightly oil or butter a 9×13-inch baking pan. To assemble the lasagna, spoon about 1/4 of the butternut sauce into the bottom of the prepared pan and spread to thinly coat the bottom. Place 1/4 of the noodles on top and then spread 1/3 of remaining sauce on noodles. Top with 1/2 of the mushroom/greens mixture, and 1 cup of Gruyere cheese. Add another layer of noodles, then sauce, then the rest of the vegetables, and the remaining Gruyere. Top with the final layer of noodles and spread the last 1/3 of the sauce over top. Sprinkle evenly with the parmesan and a pinch of thyme leaves.

Cover the lasagna with foil and bake at 375°F for 30 minutes. Remove the foil and continue to bake for 10 to 15 minutes or until the top is golden and the cheese is gooey. Remove from the oven and let stand uncovered for 5 to 10 minutes before cutting and serving. A nice green salad and some good bread make this a meal.