Peanut Butter Banana Chocolate Chip Nice-Cream

I first came to know the magic of frozen bananas years ago as a cold treat after a long run on a hot and humid day. When given the freezer treatment, both the sweet and creamy aspects of bananas shine and they are transformed from fruit into dessert.

More recently, I’ve come to know what’s referred to as banana nice-cream. Frozen bananas, peanut butter, a little unsweetened almond milk, a splash of vanilla, and some mini chocolate chips blend together into something you’d swear was actual ice cream. And other than the chocolate chips, which are optional, there’s no added sugar. Totally plant-based, healthy, but eats like a decadent delight when you really need dessert.

You can play with the flavors. Instead of peanut butter, almond butter would be good, with a bit of almond extract in place of the vanilla. Instead of chocolate chips, mix in some chopped fruit and/or nuts. For those with nut allergies, sunflower seed butter is a delicious option.

I make this delicious indulgent-tasting dish in my Vitamix, but a food processor would work too. At first it’s the texture of soft-serve ice-cream and becomes as firm as regular ice-cream after about 4 hours in the freezer. If frozen longer, it gets pretty hard, so it’s best to take it out of the freezer and let sit on the counter for a bit before scooping.

If you’d like, add your favorite ice-cream toppings, then sit back and savor this rich, creamy treat there’s no need to feel guilty about. Enjoy!


Banana Peanut Butter Chocolate Chip Nice-Cream

Adapted from this Fit Foodie Finds recipe

2 frozen bananas (I peel my bananas, place in plastic wrap and freeze until solid), sliced

1/4 cup peanut butter

1/2 cup unsweetened almond milk

1/2 teaspoon pure vanilla extract

1/3 cup mini chocolate chips

Place bananas, peanut butter, almond milk, and vanilla in a high-speed blender or food processor. Blend until smooth and creamy, the consistency of soft-serve ice-cream. Add chocolate chips and blend until just mixed in.

Eat right away as a soft-serve treat or place into a container with tight-fitting lid and freeze for 4 hours until it becomes firm like regular ice-cream. If you freeze it longer, it will probably need get too hard to scoop, so it will need to sit on the counter a while to soften a bit.

Top with your favorite ice-cream toppings. Makes about 2 servings and is easily doubled.

Big Crunchy-Lidded Blueberry Muffins


Last weekend, while preparing for what feels like the apocalypse (Covid-19 pandemic), I turned to the comforting task of baking, thinking it would be nice to have something on hand I could freeze and take out for a little treat here and there. We all still need treats!

Recently I made muffins for a work party welcoming a new staff member and they were delicious. With blueberries still in the fridge, making blueberry muffins was the obvious choice, but I had run out of grapeseed oil, my go-to neutral oil when a recipe calls for canola or vegetable oil.

Having made some cakes and sweet breads with olive oil, I thought that might make a suitable substitute, but wasn’t sure if the flavor would overwhelm the blueberries. What I ended up using was a mixture of olive oil and melted butter, and I actually think it made for an even better muffin than the original. Also, instead of the coarse sugar the recipe suggested sprinkling on the muffins prior to baking, I opted for cinnamon sugar. And to make the muffins lean a little healthy, I used whole wheat pastry flour for half of the all-purpose flour the recipe called for.

Off to the freezer these muffins went. We’ll dig into them once the Chocolate Stout Cupcakes with Irish Whiskey Buttercream I made for the office birthday party that was cancelled because we’re all now working from home are gone. I hope this social distancing thing doesn’t result in packing on a few extra pounds—I am making sure to work out a little longer each day now that I don’t have drive time.

Enjoy these treats if you make them, and by the way, frozen blueberries will work equally well. Wishing you all good health in the days to come!


Big Crunchy-Lidded Blueberry Muffins

  • Servings: 8 large or 14 regular muffins
  • Print
Adapted from this Sally’s Baking Addiction recipe, one of my go-to sites for all things baking. I used these muffin/cupcake molds and they make a large, but not jumbo muffin. They stand by themselves on a baking tray. You could also use a large muffin tin. If you want standard size muffins, the baking time will need to be shorted and I have listed the different times in the recipe instructions.

1 ½ cups unbleached all-purpose flour

1 ½ cups whole wheat pastry flour

4 teaspoons baking powder

½ teaspoon salt

1 teaspoon ground cinnamon

2 large eggs, at room temperature

1 cup granulated sugar

1 cup low-fat buttermilk, at room temperature

¼ cup (half a stick) butter, melted

¼ cup extra-virgin olive oil

1 teaspoon pure vanilla extract

1 ½ cups fresh or frozen (do not defrost) blue berries, divided

Cinnamon sugar for sprinkling (1/4 cup granulated sugar mixed with one tablespoon cinnamon)

Preheat oven to 425 degrees F. If not using muffin molds or liners, spray your muffin pan with non-stick spray or butter it.

In a large bowl, mix together the flours, baking powder, salt, and cinnamon.

In a medium bowl, whisk together the eggs, sugar buttermilk, butter, oil and vanilla extract.

Make a well in the center of the dry ingredients and pour in the buttermilk mixture. Mix together until just combined—don’t over mix. Batter will be thick. Gently fold in 1 ¼ of the 1 ½ cups blueberries.

Scoop batter into prepared molds or muffin pans, filling about ¾ of the way full. Top each muffin with a few blueberries from the reserved ¼ cup. Sprinkle generously with cinnamon sugar (you will probably not use it all—save for cinnamon toast on a rainy morning).

If making large muffins, bake at 425 degrees F. for 5 minutes, and then reduce oven temperature to 375 degrees F. Bake for an additional 20 minutes or until tops are golden and a toothpick or tester inserted into the center of muffins comes out clean. If making regular-sized muffins, cook 5 minutes at 425 degrees F., reduce oven temp to 375, and continue baking for another 12 minutes or so.

Set pan on a cooling rack for 10 minutes, then remove muffins from pan and continue cooling on rack. Makes about 8 large or 14 regular muffins.


Ultimate Zucchini Bread


Up until recently, if you mentioned zucchini bread to me, I would have said, “Meh.” It was okay, but nothing I would have chosen to make unless I was desperate to use up some zucchini and wasn’t feeling a savory recipe.

So when I saw a zucchini bread recipe pop up on the Smitten Kitchen, the only reason I didn’t skip right over it was the word “ultimate” in the title. Deb Perelman doesn’t throw around words like that without the goods to back ‘em up.

With that in mind, and some farmers’ market zucchini in the crisper, I baked a loaf that Pete and I enjoyed the heck out of. Soon after, another one when I had a tooth pulled and needed something moist and soft that didn’t require actual chewing (and kept this one all to myself). And another loaf after that to serve with breakfast when my parents were visiting. And, again, to take to take to the cabin. In between, I was craving this stuff. Crazy, right? Never in a million years did I think I’d actually be craving zucchini bread!

The nice thing is, this loaf of yumminess is so quick to mix up and pop in the oven. A one-bowl feat of ease with no need to wring the moisture out of the zucchini. And it freezes beautifully!

Deb mentions using a neutral oil, melted, butter, or olive oil. Wanting to maximize the health factor, I opted for olive oil. With the first loaf, I think I used whole wheat pastry flour for ½ cup of the 2 cups flour, and each time I made it, I increased the percentage of whole wheat till there was no white flour included. Totally whole grain without any heaviness or grainy texture—yay!

The only hard part about this recipe is the suggestion requirement of waiting 24 hours after baking to dig into it. Be assured, though, this is necessary in order for it to live up to the “ultimate” moniker. Once you’ve waited that excruciatingly long full day, I think you’ll agree, the delay was worth it.

In order to keep the crunchy dome of this treat crunchy, don’t cover it, just let it sit out on the counter in the pan in which it was baked—no need to do anything else—I’ve got four (or more by now) loaves under my belt, so am speaking from experience. Just wrap the cut end in foil and return it to the pan and keep it on the kitchen counter. I pretty much guarantee it won’t last long–it’s that good!

Eaten plain or slathered with whatever spread, butter, or topping you please, let this warmly-spiced sweet treat ease you into fall. And if you happen to have made a batch of the Smitten Kitchen’s Peach Butter like I did, it will elevate this “ultimate” zucchini bread to super ultimate status. Enjoy!


Amazing Zucchini Bread

Slightly adapted from this Smitten Kitchen Recipe

2 cups (13 ounces or 370 grams) grated, packed zucchini, not wrung out, grated on the large holes of a box grater

2 large eggs, room temperature

2/3 cup (160 ml) extra-virgin olive oil, butter, or a neutral oil like safflower or grapeseed

½ cup (95 grams) packed dark brown sugar

½ cup (100 grams) granulated sugar

1 teaspoon pure vanilla extract

1 teaspoon fine sea or table salt

1 ¼ teaspoons ground cinnamon

1/8 teaspoon ground or freshly grated nutmeg

¾ teaspoon baking soda

½ teaspoon baking powder

2 cups (9.65 ounces or 275 grams) whole wheat pastry flour (I like Whole Foods 365 Organic)

2 tablespoons raw or turbinado sugar

Heat oven to 350 degrees F. or 335 if you have a convection oven. Lightly coat a 6-cup or 9×5 inch loaf pan with cooking spray.

Place grated zucchini in a large bowl and add oil, eggs, brown and granulated sugars, vanilla, and salt. Mix with a fork until combined.

Sprinkle cinnamon, nutmeg, baking soda, and baking powder over the surface of the batter and mix until combined. Then, to ensure ingredients are well-dispersed, mix an additional 10 or so stirs.

Add flour and mix until combined, with no pockets of flour remaining. Pour into prepared pan and smooth the top. Sprinkle with the raw or turbinado sugar—use it all—it will make that awesome crunchy dome.

Bake for 55-60 minutes or until a toothpick or tester inserted into the middle of the loaf comes out batter-free. Because I have a history of quick breads being doughy in the middle, to ensure doneness, I also use an instant read thermometer to test the internal temperature. If it’s not between 195 and 200 degrees F., I put it back in the oven until it reaches that temperature range.

Remove from oven and cool completely on a wire rack. Leave in the pan, unwrapped, overnight or 24 hours. Remove loaf carefully from pan, being careful not to ruin the crunchy lid, and cut into slices. Zucchini bread keeps 4-5 days at room temperature. Only the cut end of the loaf needs to be wrapped in foil; store the bread in the baking pan.

Makes 8-10 servings.


Rugelach

It’s been years since I made a new kind of cookie during the holidays. This year, rugelach seemed to be everywhere, the December issue of Bon Appétit, in the Smitten Kitchen cookbook and blog, and a local newspaper cookie spread to name a few. A treat that was never on my radar before had me so intrigued, especially the version in Bon Appétit after Pete even noticed the delicious looking cover.

Most of the recipes were very similar, but a couple aspects of Bon Appétit ‘s got my attention: the slightly different shape and the use of raspberry sugar (made with freeze-dried raspberries) for the final sprinkling instead of the cinnamon sugar that most others used. Other than that, I kept more toward the Smitten Kitchen’s rugelach.

Thinking freeze-dried raspberries would be hard to find, I was surprised to find them at Whole Foods. And there was nothing added to them—no sugar or preservatives—yay! If you can’t find freeze-dried raspberries, just use more cinnamon sugar in place of the raspberry sugar.

It was a little confusing going back and forth from the magazine, the Smitten Kitchen blog and the Smitten Kitchen cookbook, but I wanted aspects of each. What I’ve typed up below is a mish-mash of three recipes, which take some liberties regarding the traditional mini-croissant shape, and, in my humble opinion, makes for prettier cookies that are less putzy—no cutting the dough into tiny wedges to be rolled individually, thank goodness!

And the funny thing is, I haven’t sampled them yet. I had a tooth pulled two days before I made them and was still babying my mouth with softer foods, so Pete was the sole taster. With his trustworthy opinion, I’m confident everyone will love them come Christmas—they’ve been banished to the freezer till then–I can’t wait! Enjoy!


Rugelach

  • Servings: makes about 40
  • Print
Adapted from December 2018 Bon Appétit Magazine, the Smitten Kitchen Cookbook, and the Smitten Kitchen Blog

Dough
2 cups (260 grams) all-purpose flour
1/2 teaspoon fine sea or table salt
1/2 pound (225 grams) unsalted butter, room temperature
1/2 pound (1 8-ounce or 225-gram package) cream cheese, room temperature

Filling
2/3 cup (135 grams) granulated sugar
1 1/2 tablespoons ground cinnamon
1/3 cup miniature chocolate chips or finely chopped bitter- or semi-sweet chocolate
1/3 cup toasted nuts, chopped small (I used pecans)
1/3 cup dried fruit, chopped small (I used tiny dried currants, no chopping needed)
1/2 to 3/4 cup jam (I used seedless raspberry)

Finish
1 egg beaten with 1 teaspoon water
½ cup freeze-dried raspberries
¼ cup granulated sugar

To make the dough, in bowl of a stand mixer, beat butter and cream cheese together until light and fluffy. In a medium bowl, combine the salt and flour, then pour the flour mixture into the mixer. Beat on a lower speed until the flour is just incorporated. Scrape dough onto a large piece of plastic wrap and form into a flat rectangle.

Chill dough in plastic wrap until totally firm, about 2 hours in the fridge or 30 minutes in the freezer. (Dough keeps in fridge for up to a week, and in freezer much longer.)

Heat oven to 350 degrees F. and line a couple baking sheets with parchment paper or nonstick baking mats.

To prepare fillings, stir cinnamon and sugar together in a small dish. Combine coarse mixture of chocolate, nuts and dried fruit in a second dish. Warm the jam in a small saucepan over low heat or in the microwave to make it easier to spread thinly.

For finishing, make raspberry sugar by finely grinding dried raspberries in a spice mill or with a mortar and pestle. Transfer to a small bowl and mix in ¼ cup granulated sugar. If you can’t find freeze-dried raspberries, just use more cinnamon sugar in place of the raspberry sugar.

Divide chilled dough into quarters and roll first quarter (the remaining three can go back into the fridge until needed) out on a floured counter, parchment, or baking mat into a rectangle about 12 inches wide and 7 to 8 inches long, with the wider side to you. Thinly spread jam to all but the furthest 1/4 inch from you—which seals better once rolled if bare—with about 2 to 3 tablespoons jam. Sprinkle with 2 tablespoons cinnamon-sugar mixture, then 4 tablespoons coarse fruit and nut mixture. Use a piece of waxed paper to gently press the toppings into the dough so they stay put better when rolled.

Roll dough from the 12-inch side in front of you into as tight as a log as you can, using your fingers to lightly seal the ends onto the log. Repeat with remaining logs.

Place log of filled dough in freezer for 10 to 15 minutes; it will cut more cleanly once semi-firm.

Trim ends from log so they have a clean edge. Brush tops of dough with egg wash. Sprinkle with ¼ of the berry sugar and cut into wedges 2” wide at the base and ½” wide at the point. Make each cut on a diagonal, changing directions each time so that the short and wide ends alternate. Place cut pieces about 2 inches apart on prepared baking sheet.

Bake for 20 to 25 minutes, until puffed and golden. Transfer the rugelach to cooling racks while they are still hot because the jam that spills out will harden as it cools, making the cookies difficult to remove.

Cookies keep in a container at room temperature for a week, and in the freezer for a month. Makes about 40 cookies.

French Strawberry Cake


Yesterday we celebrated the birthday of a very special person, Pete’s mom Ginny, over a delicious Italian restaurant lunch and had a wonderful time.

But a birthday just isn’t a birthday without a special cake, so I decided to make a dessert that we could have back at Ginny’s afterwards.

There were only four of us, and not wanting a lot of leftovers, I looked for a single layer cake recipe. With spring FINALLY having sprung in Minnesota, I wanted something fresh and bright in keeping with this new season. Seeing beautiful strawberries at the store, I looked in that direction and found a recipe for French Strawberry Cake, a variation of the classic French Apple Cake.

Exactly what I was looking for, not too big, bursting with spring flavors, and suited for a special occasion. Accompanied by lightly sweetened whipped cream, it was just right, and a cake I will definitely make again. In fact, now I’m wishing we had lots of leftovers!

Fast and easy enough to whip up on whim, but with an almost custard-like center and a sugar-topped crunchy dome, it has a fanciness that elevates it above an everyday cake. Enjoy!


French Strawberry Cake

Adapted from this Foodtastic Mom recipe

1/2 cup (8 tablespoons) unsalted butter, room temperature

1 1/4 cup granulated sugar, divided

2 large eggs, room temperature

1 teaspoon pure vanilla extract

1 1/3 cup unbleached all-purpose flour

1 1/4 teaspoon baking powder

1/4 teaspoon salt

1/2 cup sour cream

1 pound fresh strawberries, hulled and sliced, plus extra whole berries for garnish

1 ½ cups heavy whipping cream

1 ½ tablespoons powdered sugar

Preheat oven to 350 degrees F. Grease a 9-inch round cake pan or a 9-inch spring-form pan with removable sides.

In the bowl of a stand mixer, cream the butter and 1 cup of the sugar until pale and fluffy, about 5 minutes.

Add the eggs, one at a time and mix well after each addition. Mix in the vanilla.

In a medium bowl, whisk together the flour, baking powder and salt. Gradually add the flour mixture to butter mixture alternately with sour cream, beginning and ending with flour mixture, mixing just until combined after each addition.

Fold in all but about 1/3 cup of the sliced strawberries. Spread the batter in the prepared pan. Arrange the rest of the sliced strawberries evenly on top of the batter. Sprinkle with remaining 1/4 cup of the sugar.

Bake until the top is golden and the center is set, about 45 minutes.

Let the cake cool completely in the pan. If using a pan with removable sides, run a butter knife around edges and release sides. If in a cake pan, run a butter knife around edges, invert cake onto a plate and turn over onto a serving platter.

Just before serving, place cream and powdered sugar in the chilled bowl of a stand mixer, fitted with whisk attachment. Whisk on medium speed for several minutes, until soft peaks form.

Slice cake and serve topped with a dollop of whipped cream and a whole strawberry. Makes six servings.

Red Wine Velvet Cake with Mascarpone Buttercream


With fresh berries being in season, the time is now for this pretty cake, which actually falls into the category of “naked” cake with its exposed layers and minimal amount of frosting (this was a new term for me and my first “naked” cake).

Given the July birthday boy and girl’s suggestion of a buttercream frosted cake for this month’s office birthday treats, I perused many recipes looking for something rather elevated from your typical cake and frosting. After changing my mind a few times, I settled on Red Wine Velvet Cake from the always solid Smitten Kitchen Cookbook by Deb Perelman. And she’s got a new cookbook coming out soon—I’m so excited!!

With three 9-inch layers, it’s a good sized cake, one that I knew would easily feed my sweets-loving office mates. After making a few cakes lately in the 9-inch pans, a two-layer 8-inch cake seems so tiny! And you can cut slimmer pieces when you have three layers and still feel like you get a big piece of cake. Yes, please!

I followed the cake recipe exactly, but switched up the topping/frosting a bit. Liking the fact that mascarpone cheese was called for in the original cake topping, but heeding the request of buttercream, I decided on a mascarpone buttercream—the best of both worlds. It’s easily one of the most delicious frostings I have ever tasted, and not over-the-top sweet.

The addition of the berries was mine after scrolling through an endless number of beautiful “naked” cakes on Pinterest. Wait until just before serving to add them though. Enjoy!

Red Wine Velvet Cake with Mascarpone Buttercream

From The Smitten Kitchen Cookbook by Deb Perelman

16 tablespoons (225 grams or 2 sticks) unsalted butter, at room temperature, plus more for greasing pans

2 3/4 cups (345 grams) all-purpose flour, plus more for pans

2 cups (380 grams) firmly packed dark brown sugar

2/3 cup (135 grams) granulated sugar

4 large eggs, at room temperature

2 cups (475 ml) red wine (any variety—I used a blend)

2 teaspoons pure vanilla extract

1 1/3 cups (115 grams) Dutch cocoa powder

1/2 teaspoon baking soda

1 teaspoon baking powder

3/4 teaspoon ground cinnamon

3/4 teaspoon salt

Fresh berries for garnish

Mint leaves for garnish

Powdered sugar, for dusting the garnish

Mascarpone Buttercream Filling (recipe follows)

Preheat oven to 325 degrees F. Grease three 9” round cake pans with butter or non-hydrogenated shortening. Line each pan with a round of parchment paper and grease the paper. Dust bottom and sides of pan lightly with flour.

In a medium bowl, whisk together the flour, cocoa, baking soda, baking powder, cinnamon, and salt. Set aside.

Cream the butter in the bowl of an electric mixer on medium speed until smooth. Add the sugars and beat until light and fluffy, approximately 3 minutes. Add eggs and beat well, followed by the red wine and vanilla extract.

At this point the batter will look like a somewhat mottled mess, but don’t worry. Mix the flour mixture into the wet ingredients until mostly, but not quite combined. Remove the bowl from your electric mixer and continue to stir with a rubber spatula until fully combined.

Divide batter evenly among the three prepared pans and smooth the batter with a spatula. Bake for 20-25 minutes or until a toothpick inserted into the center of cakes comes out clean.

Cool the cakes on a rack for 10 minutes and then turn each cake out onto the rack to cool completely and remove parchment. Once cakes are cool, if the tops are domed, you can use a long serrated knife and cut horizontally to remove the dome. The cake scraps make for a nice snack while you prepare the frosting. If making ahead, you can wrap the cooled cakes in plastic and foil and freeze.

Mascarpone Buttercream Filling (From this Southern Living recipe)

1 pound powdered sugar

1 cup (2 sticks) unsalted butter, room temperature

1 teaspoon pure vanilla extract

Pinch of salt

8 oz. mascarpone cheese, room temperature

Beat sugar and butter on medium-high speed until thick and creamy, about 4-5 minutes. Beat in vanilla and salt. Add mascarpone and mix on low speed just until combined. Do not overmix or the mascarpone will start to break down and the frosting will become too thin.

To assemble, place a cake layer on a cake stand or platter and frost the top with 1/3 of the buttercream. I found this easiest do by fitting a disposable piping bag with a ½ inch plain piping tip and making a generous piped edge around the perimeter and then fill in the center and spread with an offset spatula for an even frosting thickness. Repeat with the other two layers. Swirl the frosting on the top layer to make it pretty.

Store cake in the fridge, removing about 30 minutes before serving. Right before serving, top with a pile of berries and place some around the sides of the cake too. Stick a few mint leaves in as well. Sift powdered sugar over the berries right before cutting the cake (it tends to eventually dissolve on the berries, so don’t do it until the last minute).

Cut into somewhat thin wedges and serve (with three layers, your pieces don’t need to be large). Makes about 16 servings.

Tiramisu Cupcakes

OLYMPUS DIGITAL CAMERA
When I asked our three February birthday people at the office what they’d like for the monthly party, two deferred to the third, who responded “anything chocolate or coffee/chocolate.” That sent me in search of recipes and I settled on King Arthur Flour’s Tiramisu Cupcakes, plus a couple other coffee/chocolate treats, but the cupcakes were the stars.

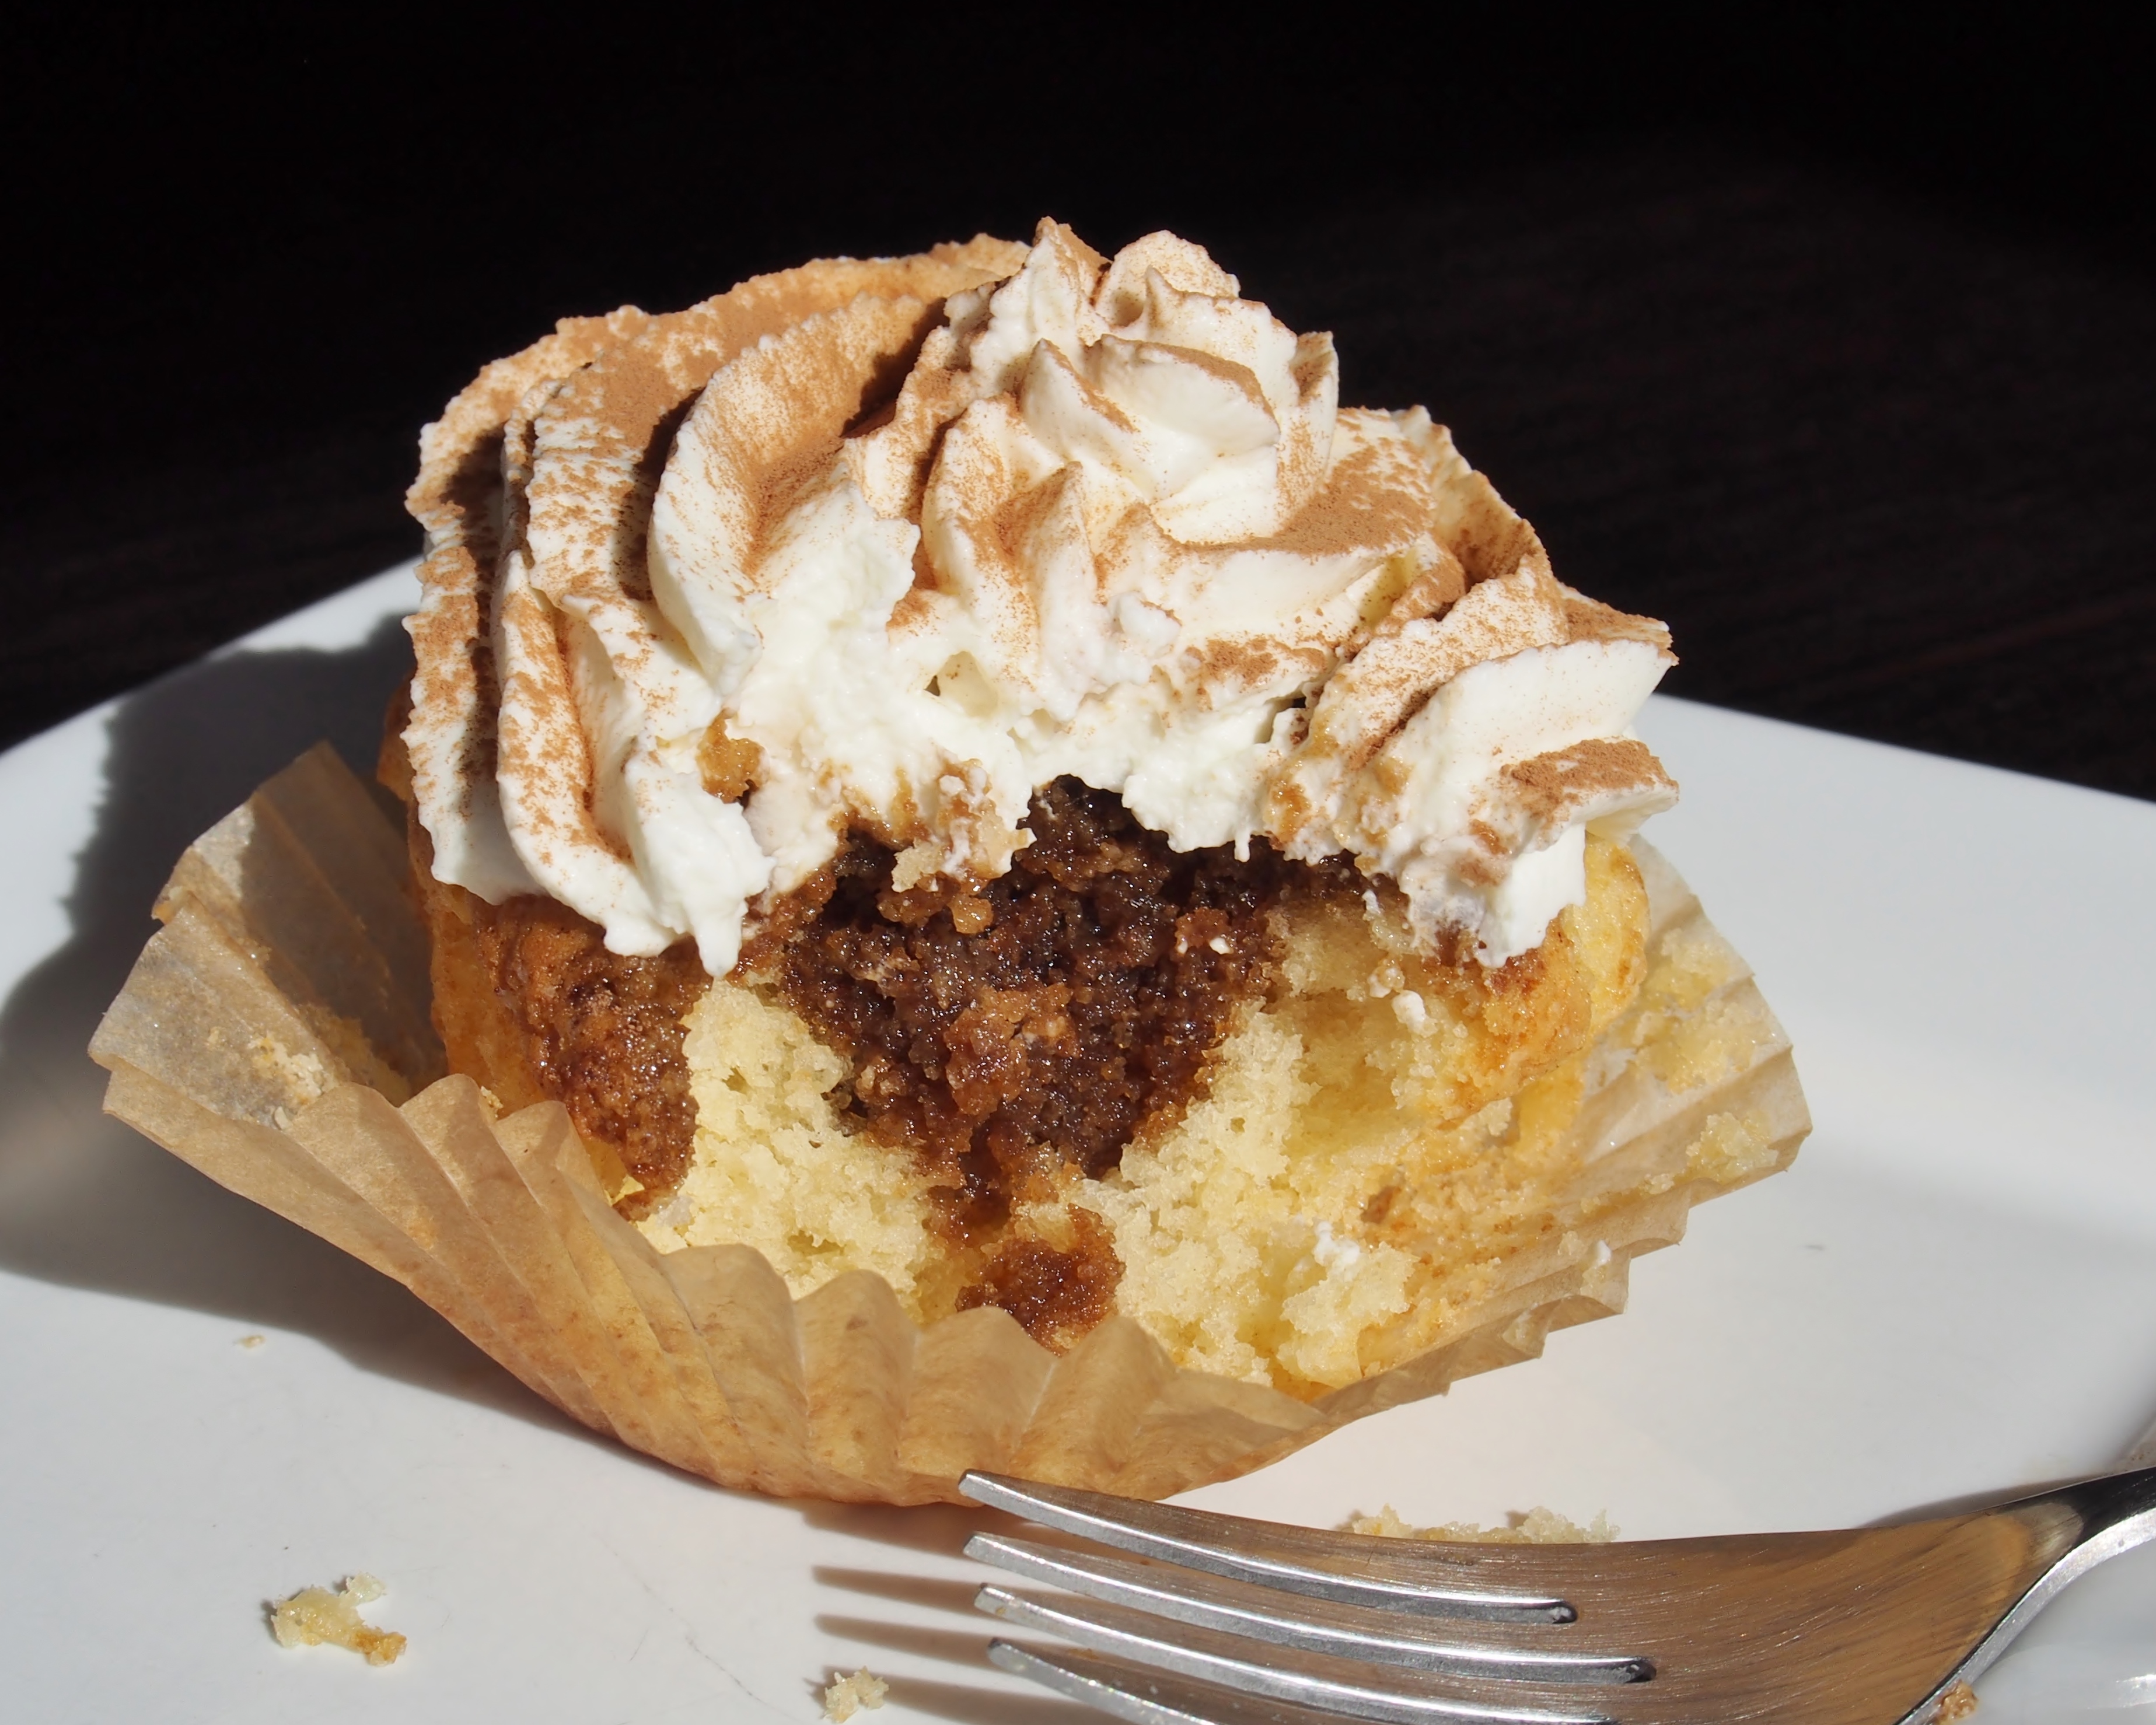
Who doesn’t like a boozy dessert? Tiramisu, but in the form of a cupcake—a very vanilla cupcake, with a Kahlua espresso soak and a creamy amaretto mascarpone frosting dusted with cocoa. Yes, please! Homemade tiramisu without the need to hunt down a decent package of lady fingers (or figure out how to make your own!).

The recipe reviews are what sealed it for me—they were all great. And they were right. These are a special cupcake. Unique with the “soak” that provides that boozy bite in the middle of a really vanilla cake, and the frosting—oh, the frosting! A not-too-sweet, whipped cream-mascarpone cheese mixture spiked with amaretto (almond liqueur). Wow!

The original frosting recipe called for Instant Clear Jel, which, conveniently, you can order from King Arthur Flour. It’s actually modified food starch, which is chemically processed and not something I want in my food, so I used less processed corn starch. It still keeps the frosting, which contains a lot of whipped cream, from deflating. Arrowroot powder might work as well, but I didn’t want to chance it. Next time I make these at home, I’ll try it and will update the recipe if results are good.

Don’t skimp on the soak. After making a smaller test batch, I told myself to use more of the soak mixture. When I made the larger, “for real” batch, I thought I had used more of the soaking liquid (brushed each cupcake many, many times), and I was worried it was too much liquid (afraid they’d be soggy), but the cupcakes could have used even more of it, so be generous.

Keep in mind that because the alcohol in both the soak and the frosting isn’t cooked off, these should be adults only cupcakes. And all the adults at the office birthday party gave them rave reviews. Enjoy!OLYMPUS DIGITAL CAMERA

OLYMPUS DIGITAL CAMERA

Tiramisu Cupcakes

Slightly adapted from King Arthur Flour

Cupcakes
1 3/4 cups sugar

3/4 cup butter, room temperature

3 large eggs, room temperature

3 tablespoons vanilla extract

2 3/4 cups unbleached all-purpose flour

2 1/2 teaspoons baking powder

3/4 teaspoon salt

1 cup whole milk

Soak
3 tablespoons coffee liqueur, such as Kahlua

2 tablespoons espresso powder

3 tablespoons sugar

3/4 cup hot water

Frosting
2 cups heavy cream

4 teaspoons corn starch 2/3 cup powdered sugar

1/2 cup amaretto liqueur

1 cup mascarpone cheese, room temperature

Garnish
Unsweetened cocoa powder, to dust tops of frosted cupcakes.

To make the cupcakes: Preheat oven to 350 degrees F.

In a large mixing bowl, beat together the sugar and butter until light and fluffy. In a separate bowl, whisk together the flour, baking powder, and salt.

Alternate adding the flour mixture and milk into the butter mixture, starting and ending with the flour mixture. Scrape down the sides of the bowl and mix again, to be sure everything is incorporated.

Scoop the batter into paper-lined cupcake pans. Bake for about 20 to 25 minutes, or until the cake springs back when lightly touched.

Remove the cupcakes from the oven and place the pans on a rack for 5 minutes. After 5 minutes, turn the cupcakes out and return them to rack to cool completely.

To make the soak: Mix the espresso powder, liqueur, and sugar into the hot water.

Using a fork, poke the tops of each cupcake two or three times. Sprinkle or brush a small amount of the soak over each cupcake, and allow it to soak in. Repeat until virtually all the liquid is used.

To make the frosting: Beat the whipping cream until medium peaks form.

Whisk together the powdered sugar and corn starch and slowly add to the whipped cream, along with the amaretto.

Gently and briefly whisk in the mascarpone cheese by hand until the frosting is thick and creamy (this shouldn’t take more than 4 or 5 passes with the whisk); more than that and the frosting will get grainy.

Pipe the frosting over the cupcakes, then dust with cocoa. Keep refrigerated. I think the cupcakes taste best if they are removed from the fridge about 1/2 hour before serving.

Yield: 18-24 cupcakes (I got 18, but the original recipe said 24).

Mom’s Baklava

OLYMPUS DIGITAL CAMERA
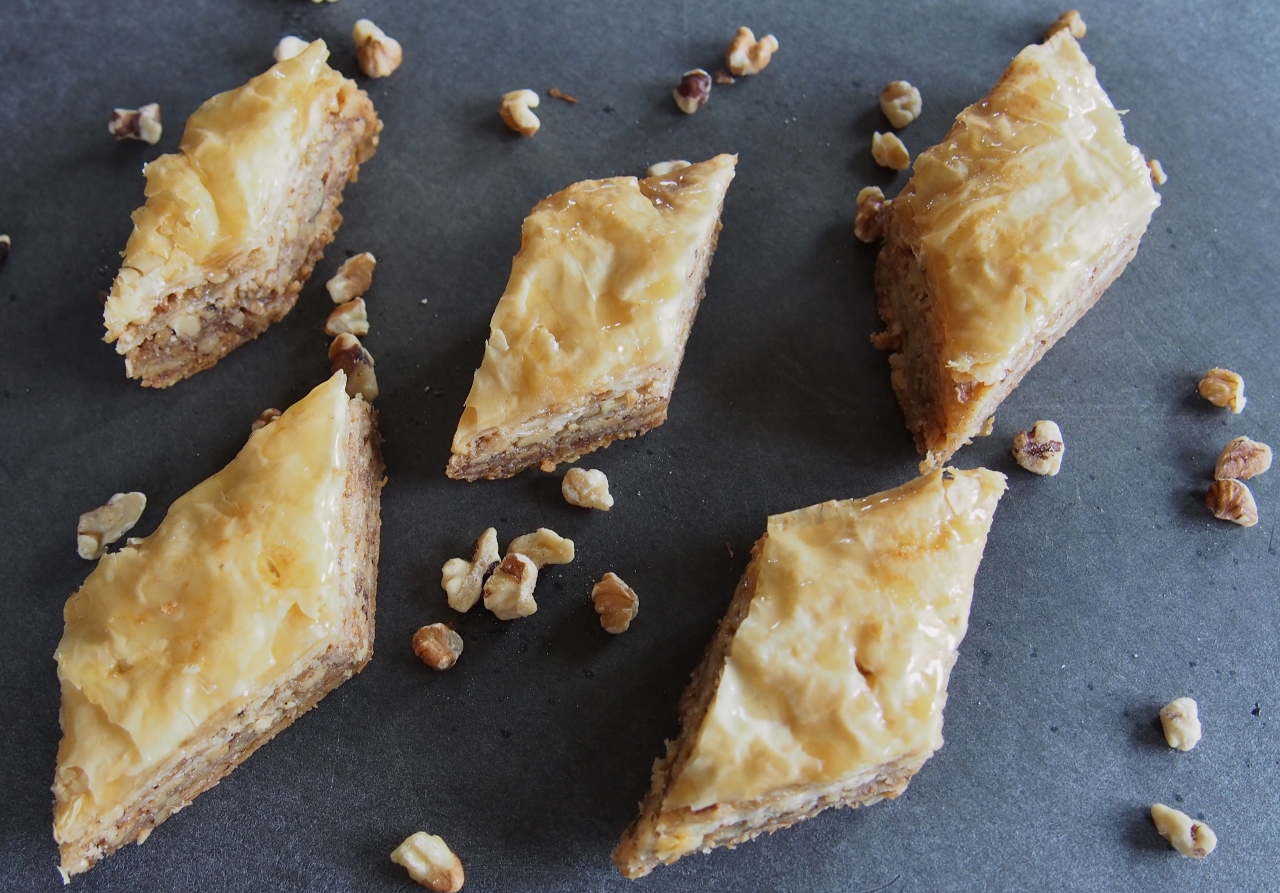
Way back when I was in high school, my mom made a mysterious dessert with a funny name that was unlike anything that had ever graced our kitchen . Dessert nirvana I tell you. But wait, it was full of walnuts, how could that be? I don’t like walnuts; at least not the big chunks found in brownies, fudge or cookies. Odd how you can dislike something when it’s one size, but fall in love when it’s chopped finely, mixed with cinnamon and sugar, suspended between butter-soaked, paper thin layers of pastry, and infused with golden honey. Swoon.

Yes, that dessert totally foreign to my adolescent self was baklava. Mom was so ahead of her time—making baklava in Fargo, North Dakota at a time when a Norwegian or Swedish treat was as exotic as they came. She doesn’t remember where she got the recipe, but I’m glad she did. It’s the best baklava I’ve ever tasted—no other version I’ve had has even come close over the years. Maybe it’s sentiment, but I doubt it; Mom’s baklava is just the best!

If you haven’t worked with phyllo (or filo) dough before, don’t be intimidated. It takes a little patience and diligently keeping the sheets of dough covered with a damp tea towel while you work with one sheet at a time, but it’s not difficult. Have everything ready and prepped before you open the package of thawed phyllo and you’ll breeze through this.
OLYMPUS DIGITAL CAMERA

OLYMPUS DIGITAL CAMERA
A bonus as desserts go, baklava has the super food factor with walnuts and cinnamon involved. It keeps unrefrigerated for about 5 days and I imagine it would freeze well. If you’re truly walnut averse (no matter how finely they’re chopped), almonds, pistachios or a combination of the two would work too. Enjoy!

Mom's Baklava

We’ve been making this recipe for decades and I have no idea of the source, so let’s just credit my mom, Annette, the best mom ever!

1 lb. (16 oz.) walnuts

1/2 cup sugar

1 teaspoon ground cinnamon

1 pound phyllo dough, thawed

1 cup (2 sticks) unsalted butter, melted

12 oz. honey

Butter a 9×13″ baking dish and set aside.

Place walnuts, sugar and cinnamon in the bowl of a food processor and pulse until walnuts are finely chopped. Alternately, finely chop walnuts and mix with sugar and cinnamon in a large bowl.

Trim phyllo to fit baking dish (mine just needed about an inch trimmed from the short end).

In the prepared baking dish, place 1 sheet of phyllo; brush lightly with melted butter. Repeat to make five more layers of phyllo; sprinkle with one cup of walnut mixture.

Place one sheet of phyllo in baking dish over walnut mixture; brush with butter. Repeat to make six layers. Sprinkle one cup walnut mixture over phyllo. Repeat layering two more times.

Over final sprinkling of walnut mixture, place a sheet of phyllo and brush with butter. Repeat to make six layers.

Preheat oven to 300 degrees F.

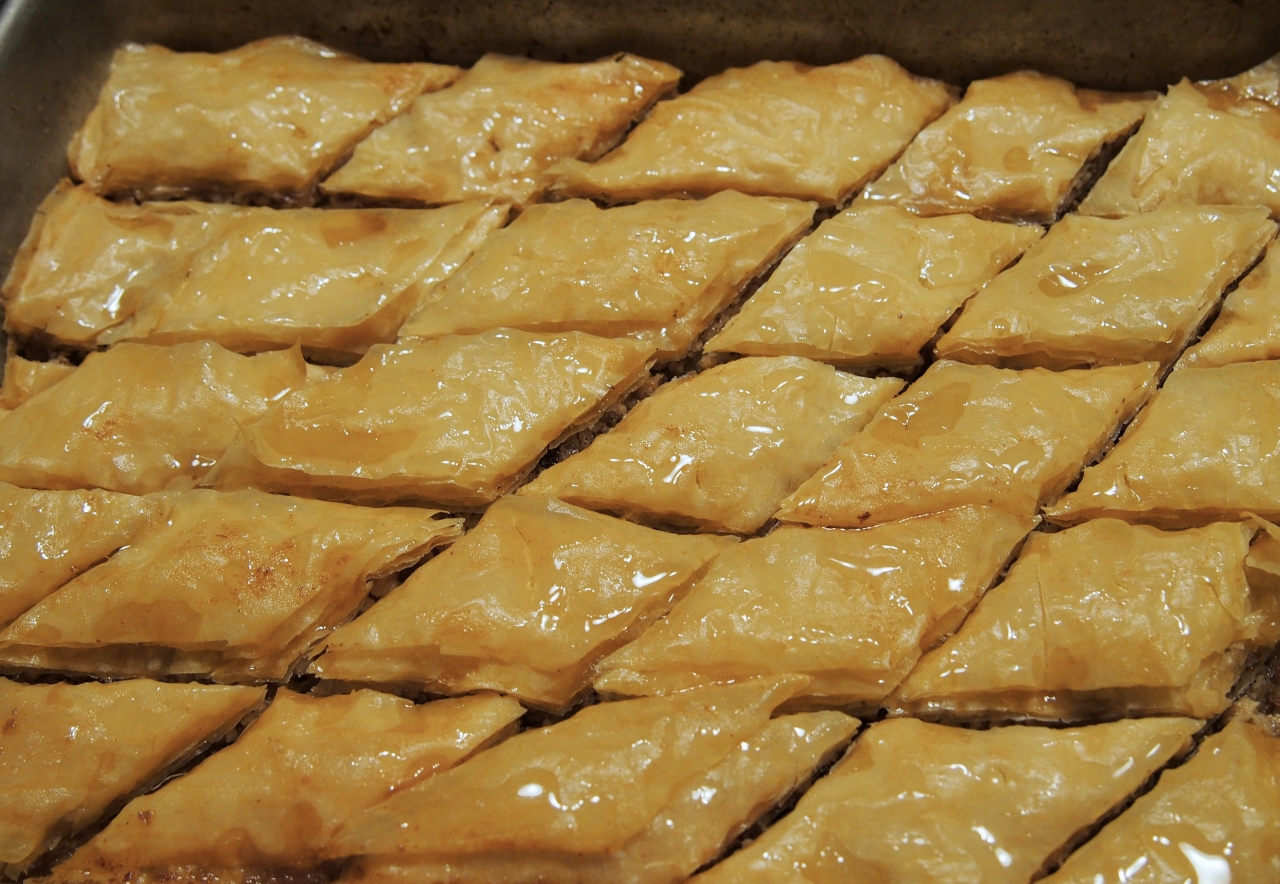
With a sharp knife, cut layers just halfway through, in strips about 1 1/2″ inch wide the long way. Then cut halfway through on the diagonal, to make diamond shapes.

Bake 1 hour and 25 minutes or until top is golden brown.

Shortly before removing pan from oven, in a medium saucepan, heat honey until hot, but not boiling. After removing baklava from the oven, spoon hot honey over it evenly. Cool in pan on wire rack at least 1 hour. Cover and leave at room temperature until serving.

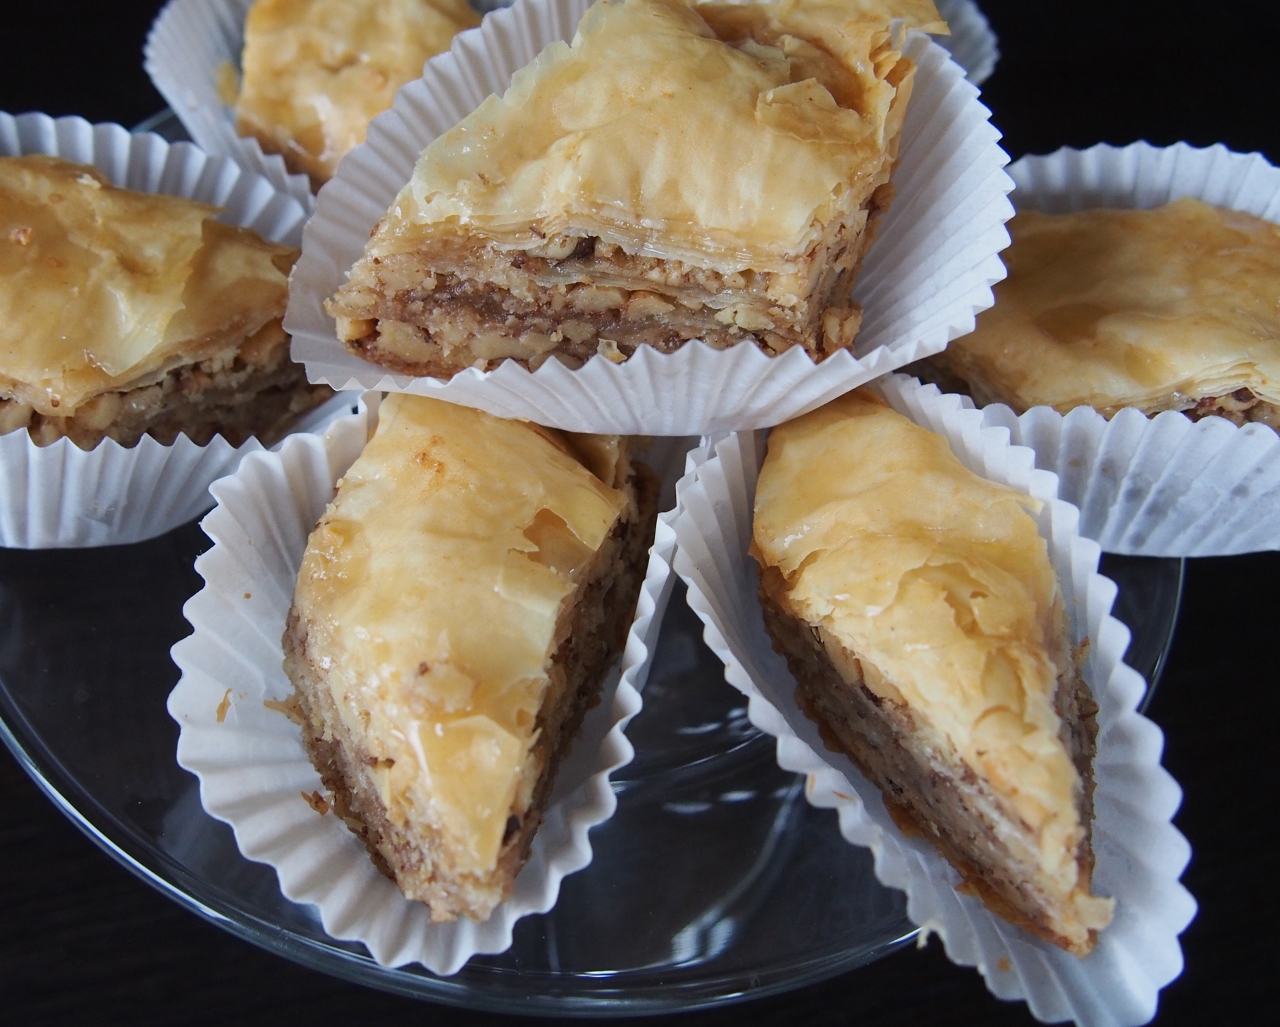
To serve: With sharp knife, finish cutting through the layers. Transfer to a platter (can place each piece of baklava in a cupcake paper to make things a little neater). Makes about 24 servings.

Note: Keep phyllo dough under a damp, clean tea towel to prevent drying as you work with it.


Cranberry Lime White Chocolate Tart

OLYMPUS DIGITAL CAMERA
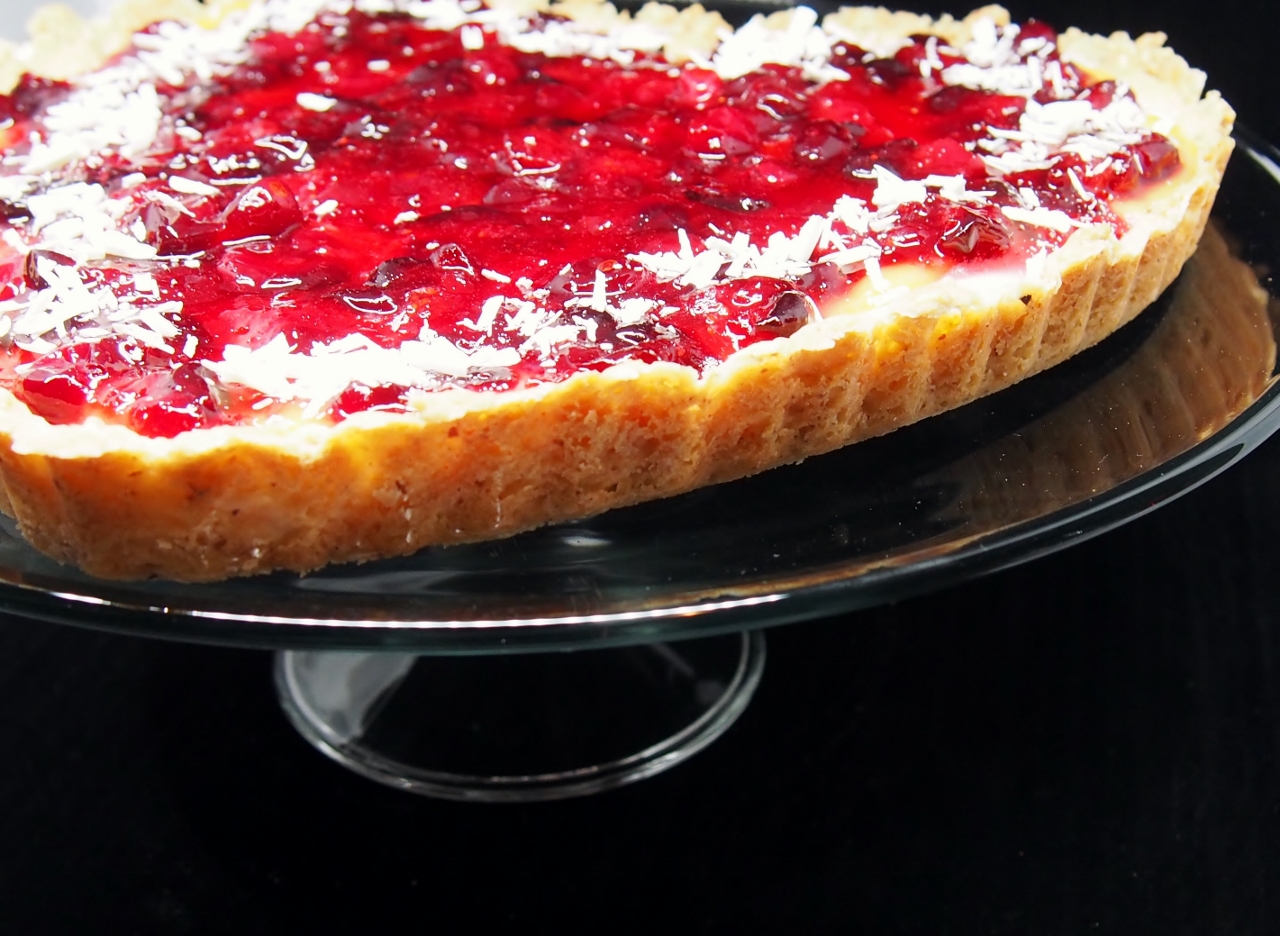
In a serendipitous turn of events, I’m posting a Valentine’s Day dessert recipe an entire month early. But by no means should this delightfully refreshing tart be reserved for the February holiday—it’s appropriate any time.

This all started when a co-worker with a January birthday shared her preference for office birthday party treats as either “a chocolate peanut butter combination or something with fruit.” I debated making a decadent peanut butter cup cheesecake, but for a mid-morning party, that might be a little too rich. Then a recipe made years ago came to mind—a somewhat light tart with fruit in two forms, fresh lime curd and cranberries. Plus almonds are in the crust, so with the incorporation of cranberries, this should qualify as super food, am I right!?!

Decision made, and completely certain I owned the called for 11-inch tart pan with removable bottom (after all, I’ve made this before!), my search for it began. Even though it’s been almost 8 years since I last moved, there are a few things still in boxes and it had to be there if not in my kitchen. After digging through boxes several times with no luck, and not enough time to order one (even with Amazon Prime!), I had to go with my closest option, a heart-shaped pan with removable bottom. Thus, a Valentine’s Day dessert.
OLYMPUS DIGITAL CAMERA

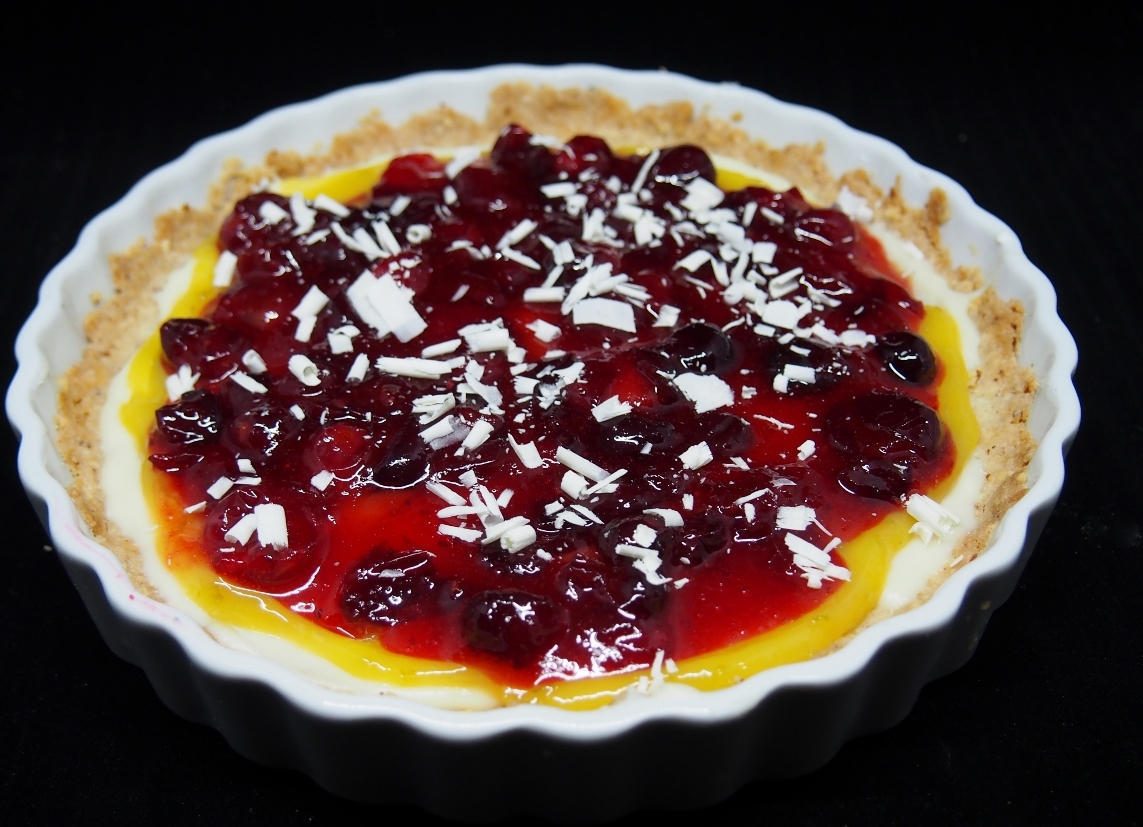
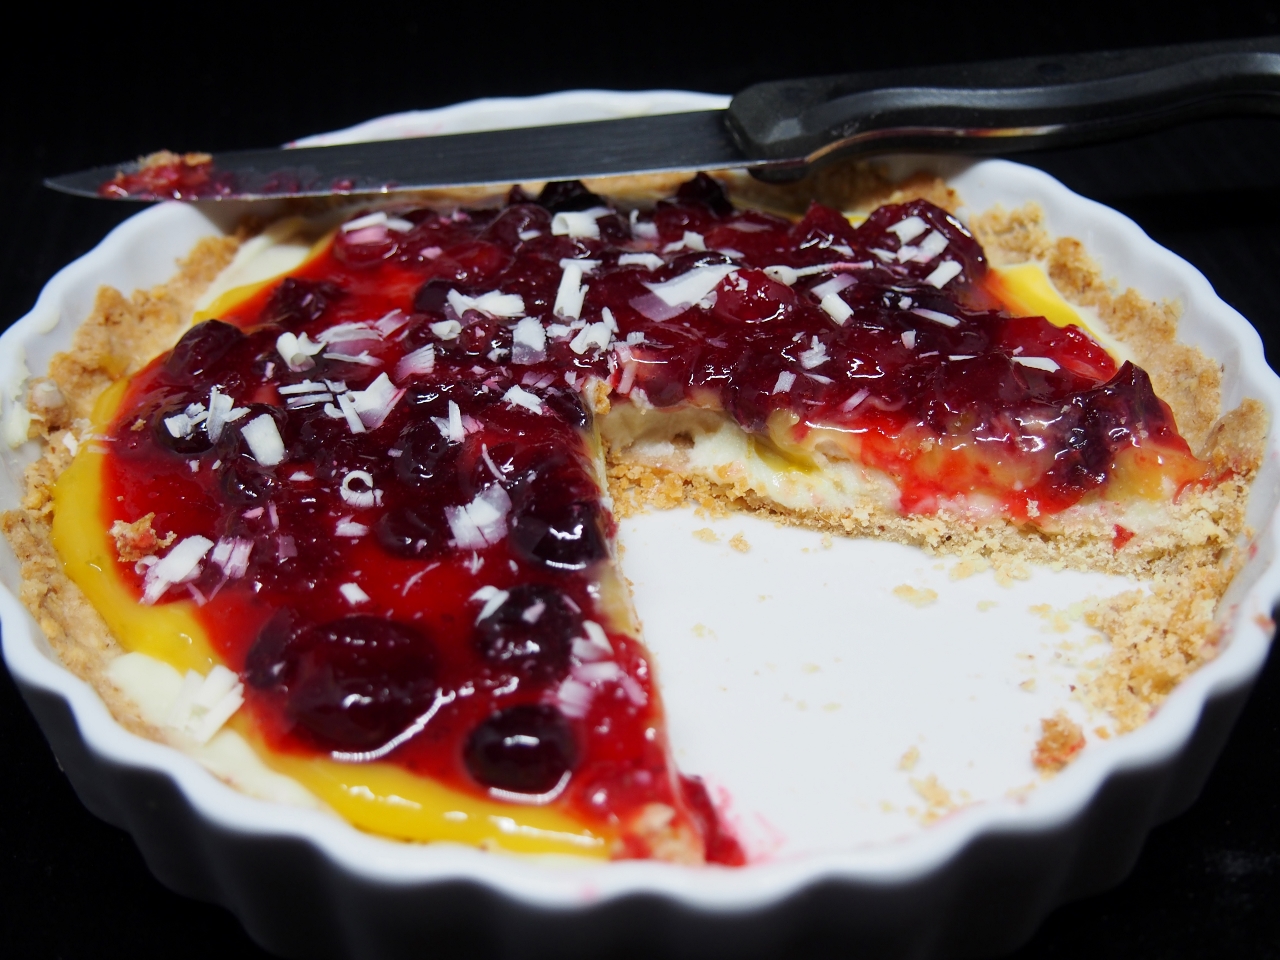
With the heart shape holding less than a round, I knew I would have extra of everything, so I made a cute little round version of the tart for Pete—because he’s such a sweetheart!
OLYMPUS DIGITAL CAMERA

OLYMPUS DIGITAL CAMERA
If you don’t have the 11-inch tart pan with removable bottom (the removable bottom is necessary to show off the sides of that pretty fluted crust), you can use a similar sized tart pan with regular bottom or improvise like I did and use a different shaped pan, but keep in mind you may need to adjust the amount of everything you put in that pan. I tried figuring out how to calculate the area of a heart so I could determine the ratio to the area of the 11” pan and that looked like too much work for me, but go for it if you’re so inclined!

The tart is quite a versatile dessert—you could play with the curd, making lemon instead of lime, or this time of year, be adventurous and go with blood orange, but then I’d cut the sugar to 1/3 to 1/2 cup. If you’re not big on cranberries, pick a different fruit that pairs well with the curd you opt for. Blueberries would be great with a lemon curd, raspberries or mango would suit the blood orange, etc. I love desserts you can tweak depending on preference or season.

Please note this is a recipe you’ll need to start a couple days before serving, but with a fairly small amount of hands on time. Most of the time involves chilling or cooling, so just plan a bit in advance. And this doesn’t have a rolled crust, you just press it over the bottom and up the sides of the pan—it’s so easy! Enjoy!
Slice

Cranberry Lime White Chocolate Tart

Adapted from this Bon Appetite recipe
Begin preparing the tart two days before you plan to serve it

Lime curd
1/2 cup fresh squeezed lime juice

1/2 teaspoon arrowroot or cornstarch

3/4 cup sugar

6 large egg yolks

1/2 cup (1 stick) unsalted butter, cut into 8 pieces

2 1/2 teaspoons grated lime zest

Crust
1 1/4 cups all-purpose flour

1/2 cup powdered sugar

1/3 cup whole almonds, toasted, cooled

1/2 teaspoon salt

3/4 cup (1 1/2 sticks) chilled unsalted butter, cut into 1/2-inch cubes

1 teaspoon vanilla extract

Cranberry Topping
1/4 cup water

1 1/2 teaspoons arrowroot or cornstarch

2/3 cup sugar

3 tablespoons honey

One 12-ounce bag (3 cups) fresh cranberries or frozen, partially thawed


White Chocolate Cream

5 ounces white chocolate, chopped

1/2 cup plus 2 tablespoons sour cream

1/2 teaspoon vanilla extract

Garnish
White chocolate curls

For crust: Finely grind flour, sugar, almonds, and salt in processor. Add butter and vanilla; cut in, using on/off turns, until mixture just forms soft moist clumps. Gather dough into ball; flatten into a disk. Wrap in plastic. Refrigerate 1 hour. Press dough onto bottom and up sides of 11-inch-diameter tart pan with removable bottom. Using thumb, press dough up sides to extend 1/8 inch above rim of pan. Freeze crust 30 minutes.

Preheat oven to 350°F. Bake crust until golden brown, pressing with back of spoon if crust bubbles, about 25 minutes. Transfer to rack and cool completely.

For lime curd: Whisk lime juice and cornstarch in heavy medium saucepan. Whisk in sugar and yolks, then add butter. Whisk constantly over medium heat until mixture simmers and thickens, about 8 minutes. Strain into small bowl. Mix in lime zest. Cover; chill overnight.

For cranberry topping: Whisk 1/4 cup water and cornstarch in heavy large saucepan to blend. Add sugar and honey. Stir over medium-high heat until mixture comes to boil. Add cranberries; cook until mixture boils and berries just begin to pop but still maintain shape, occasionally stirring gently, about 4-5 minutes. Cool completely (mixture will thicken).

For white chocolate cream: Stir chocolate in top of double boiler over simmering water until melted and smooth. Remove from over water; whisk in sour cream and vanilla. Cool completely.

To assemble: Spread white chocolate cream into crust; freeze 15 minutes. Spoon curd over; spread evenly. Spoon cooled cranberry topping by tablespoonsful over, then spread carefully to cover completely. Cover and chill overnight. (Can be made 2 days ahead. Keep refrigerated.)

Carefully remove pan sides; transfer tart to a platter. Sprinkle white chocolate curls around edge of tart.

Grandma LaPalm’s Half Moon Cookies

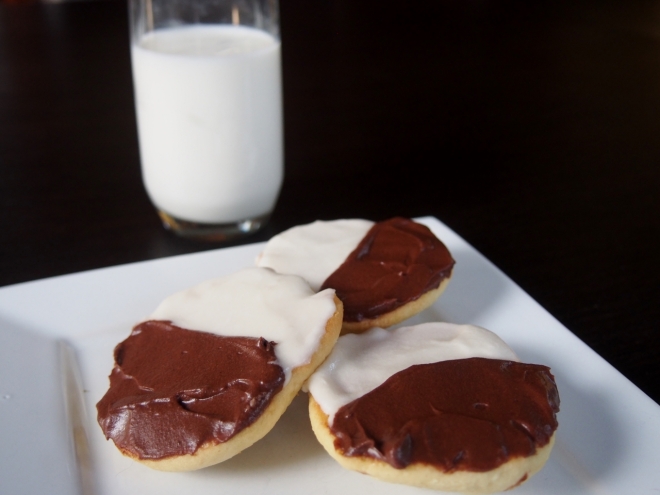
Cookies and Milk
Half Moon Cookies take me back to my childhood; warm memories of visiting my grandma in upstate New York come flooding back. Grandma LaPalm lived in a beautiful house full of antiques and very big rooms (at least they seemed big back then) in a pre-World War II neighborhood that even had an old-fashioned corner store across the street. The house had such charm—a huge front porch, claw-foot bathtub, crystal candy dish on top of the console TV, a den full of wooden toys built by my grandpa, and a mudroom illuminated by a still-burning Edison bulb original to the house.

Frosted Half Moon Cookies

Frosted Half Moon Cookies

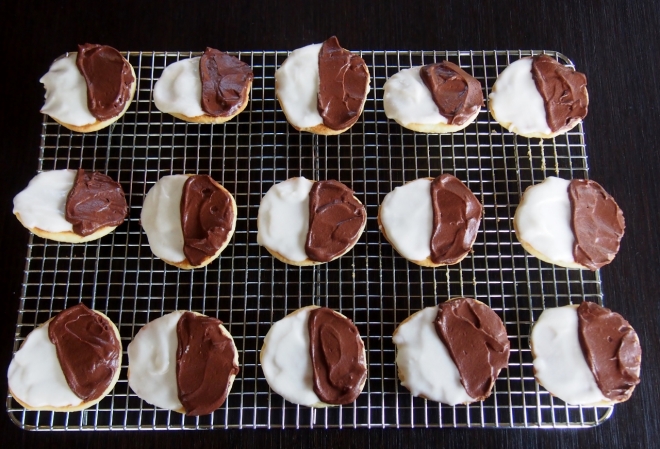
Meals at Grandma’s were always at the big round table in her cheery eat-in kitchen, never in the fancy formal dining room, which was just fine with my kid self. Next to the table was a hutch with canisters holding sweet treats, and more often than not, one of those canisters was filled with Half Moon Cookies. Big cakey cookies with half chocolate frosting and half vanilla; which side to eat first was always such a decision!

I’m not sure what made me want to bake up batch recently. Maybe the cooler weather gave me a hankering for something warm and comforting, like a visit to Grandma’s house. Enjoy!

Half Moon Cookies

Half Moon Cookies

Grandma LaPalm's Half Moon Cookies

  • Servings: 2 1/2-3 dozen cookies
  • Print
¾ cup unsalted butter, at room temperature

1 ¼ cups sugar

2 eggs

1 teaspoon pure vanilla extract

3 cups unbleached all-purpose flour

1 teaspoon baking powder

1 teaspoon baking soda

½ teaspoon salt

1 cup sour milk (1 tablespoon vinegar with milk added to make one cup; let sit 5 minutes)

Chocolate and vanilla frosting, recipe follows

In the bowl of a stand mixer or in a large bowl with hand-held mixer, cream butter and sugar until light and fluffy. Beat in eggs and vanilla.

In a medium bowl, mix together the flour, baking powder, baking soda and salt.

Alternately mix flour mixture and milk into butter-sugar-egg mixture, a third at a time, mixing well after each addition. When fully mixed, cover bowl and chill for at least two hours and up to 12 hours.

Preheat oven to 375 degrees F. Line two large baking pans with parchment. Using a medium cookie dough scoop (mine is size 30), drop scoops of dough about 2-3 inches apart on prepared pans. Bake for 9-10 minutes, rotating pans halfway through cooking, to bake evenly. Remove cookies to rack to cool.

While cookies are cooling, make frosting:

6 tablespoons unsalted butter, at room temperature

2 2/3 cups powdered sugar

1/3 cup, plus 1 tablespoon, milk, divided

1 teaspoon pure vanilla extract

1/3 cup unsweetened cocoa powder

In a medium bowl, using a hand mixer, beat the butter until fluffy. Mix in the 1/3 cup milk and vanilla alternately with the powdered sugar until all is incorporated and frosting is smooth and creamy.

Removed about half of the frosting to another medium bowl. Beat in cocoa powder and an additional tablespoon milk.

Frost cookies on the flat bottom side, not the domed top side. Frost one half of each cookie with vanilla frosting. Frost the other half with chocolate, using a thicker swath with the chocolate.

Let cookies sit at room temperature until frosting is set. Cookies keep for several days if covered (or in Grandma’s cookie canister!). Makes 2 ½ to 3 dozen cookies.